3 Ways To Measure A Customer's Ring Size As A Jeweller
One of the most frustrating statements you hear being a jeweller - "I don't know my ring size!" Do not fear! There are plenty of ways you can offer this service to your client, so you can both relax knowing it will fit after all your hard work at the bench. Below, we share 3 great products which could help you secure a sale...
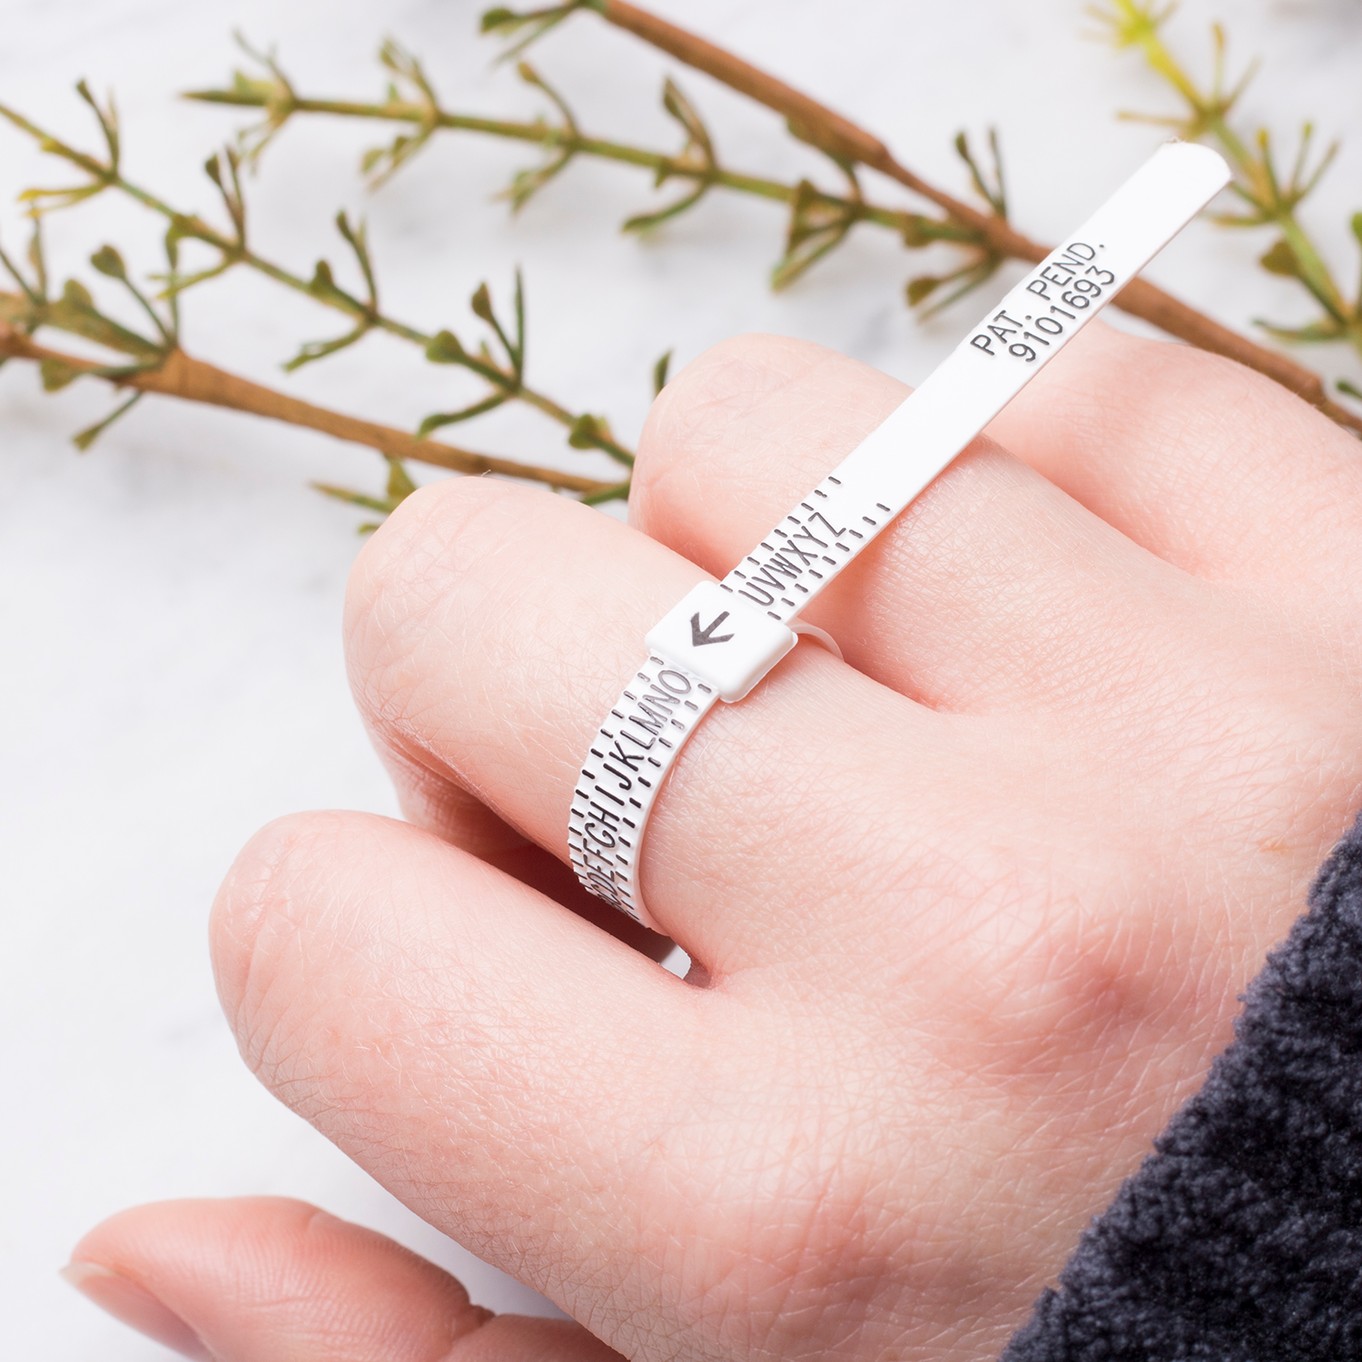
Offer A Free Multi Sizer Ring Sizing Gauge
At Kernowcraft, we offer a ring sizer in a pack of 10 which is extremely easy to use and affordable too. It works just like a belt, all you need to do is push the end through the buckle to form a ring shape and slip it onto your finger and adjust until it’s a comfortable fit. Check that the ring sizer slips back over the knuckle easily before reading the size.
Offer a ring sizer for free on your website
Who doesn't love a freebie? Many jewellers feature this ring sizer on their website for free and only charge for the postage. This means you can entice a potential new customer to connect and build trust with your business with the goal to get a sale once they know their size.
Top tip: Price the ring sizer on your website and then deduct the cost if they choose to purchase an item from you!
Bring them along to craft fairs and workshops
Someone pops over to your stand and none of your rings fit them! If they love a particular ring, this is your chance to grab a commission and make another in their size. If they don't know their size, bring out your ring sizer to secure the sale.
You could even hand them out as freebies - don't forget to give them a business card if they take one so they won't forget about your business.
Ask The Client To Send You A Ring
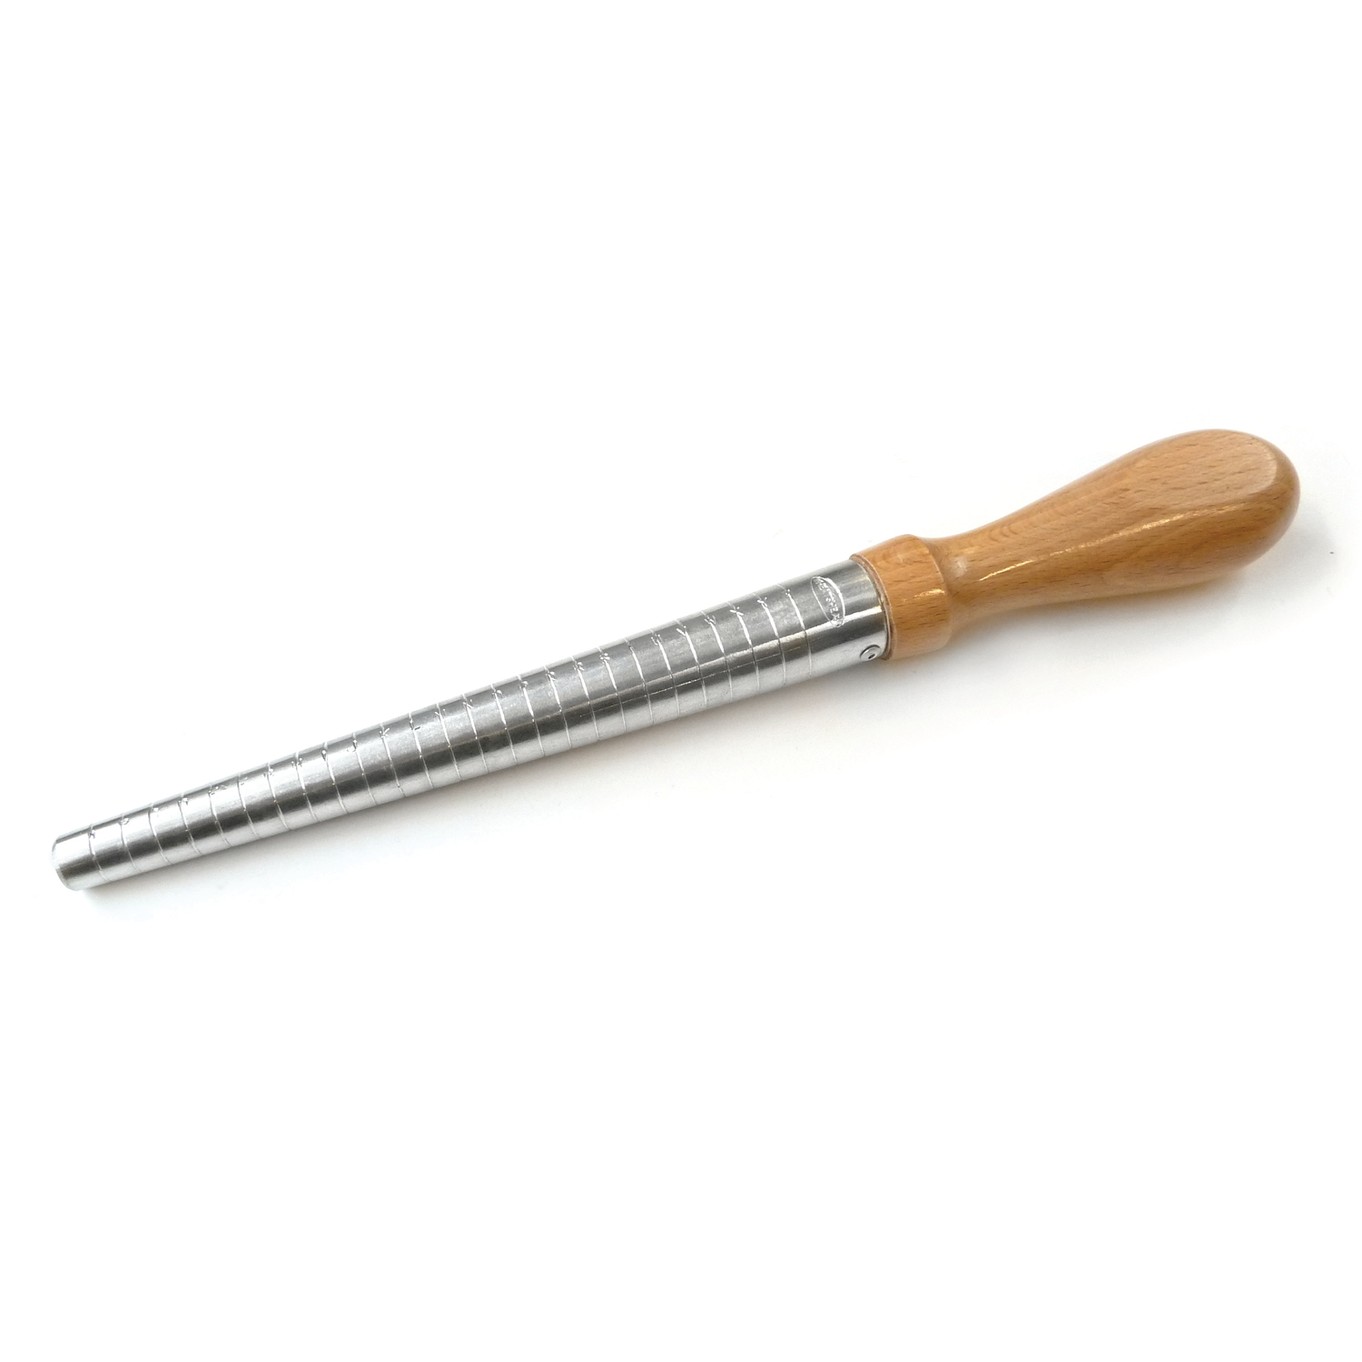
This genuine Wheatsheaf ring size stick is an essential tool for the accurate measuring of rings, marked with UK ring sizes from A-Z. This is especially great if a ring is being made as a surprise such as an engagement ring - although risky, you could ask them to send you an existing ring which will give you a good indication of the size needed.
The ring size stick is lightweight and has a comfortable wooden handle, making is a great tool to have at hand in the workshop for measuring existing rings. This is not suitable for shaping, forming or stretching rings as this could damage the stick and result in inaccuracy of sizing - please see our steel triblet which is specifically made for this.
Use A Finger Ring Gauge To Measure Their Fingers
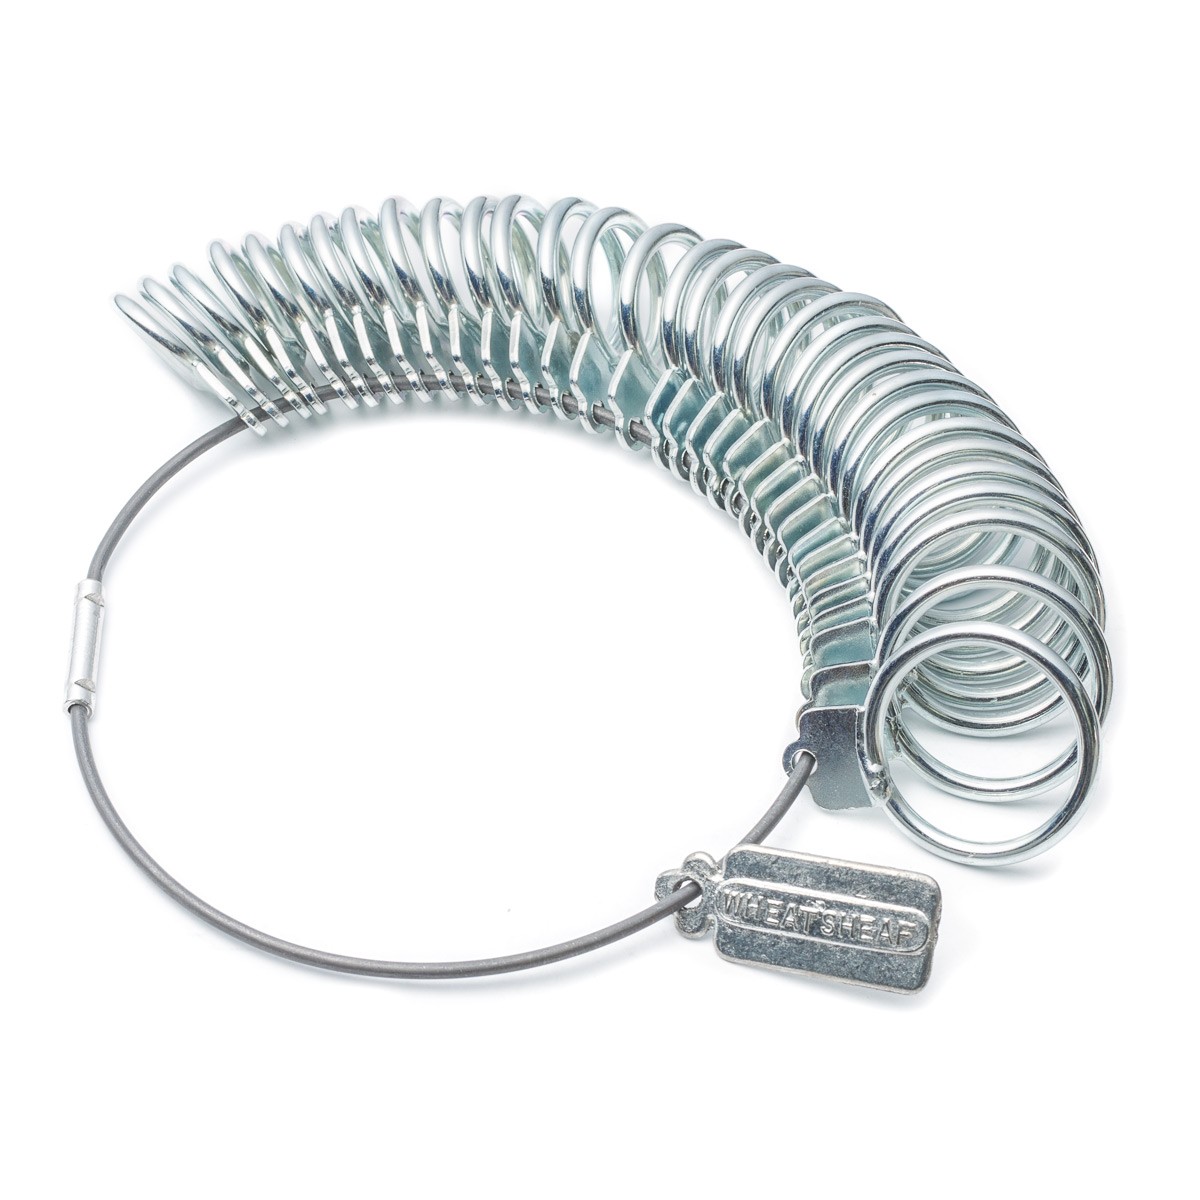
This genuine Wheatsheaf ring gauge is an essential tool for the accurate measuring of rings, marked with UK ring sizes from A-Z, plus 6 additional larger sizes.
Each ring is approximately 2mm wide and is threaded onto a closed hoop. If your client is close by, invite them over to measure their fingers. This is a much better quality and choice than using plastic as it doesn't loose its shape.
The beauty of this tool is that your client can try on a few different sizes to find the most comfortable fit.
Top tips for measuring ring sizes
Take into consideration the ring design/brief
Depending on the design and thickness of the ring band, this can alter the ring size needed - for example, larger ring bands often need to be in a larger size.
Measure fingers in the evening
Fingers shrink and expand depending on the temperature, so it's recommended to measure fingers in the evening when your fingers are likely to be at their largest.
Did you know, your dominant hand is slightly larger?
If your client is looking for an engagement ring, be aware that if they send you a ring often worn on their partner's other hand - be aware that the dominant hand is often bigger so it's good to let your client know this.
Better to go slightly smaller
If in doubt, and you do not have an accurate ring size to work with, always go smaller as it's easier to enlarge a ring by a small amount rather than make it smaller! (to make a ring smaller you will need to cut some metal out and re-solder). Many rings can be enlarged by a size or two simply by placing it over a triblet and hammering the band with a slight downward motion with a rawhide mallet to push it down the taper and stretch it.
Also in this section:
- 8 Reasons To Do A Jewellery Making Course
- 5 Steps To Creating A Profitable Jewellery Business
- Jewellery Photography Guide
- 12 Tips When Taking Photos Of Jewellery On Your Phone
- 5 Tips for Photographing Your Jewellery
- Jewellery Packaging Ideas
- 10 Packaging Tips For Your Handmade Jewellery
- All Your Questions Answered On Hallmarking Jewellery By London Assay Office
- The Power of The Jewellery Making Community
- Jewellery Making, Copyright & Being Unique
- 6 Ways To Support A Small Business
- Running A Handmade Jewellery Business On A Budget
- Preparing Your Jewellery Craft Stall
- Jewellery Craft Market Vlog & Packing List With Mareike
- 21 Tips For A Successful Craft Stall
- 10 Reasons Your Jewellery Business Needs Social Media
- How To Use Instagram For Your Handmade Jewellery Business
- How To Set Up An Etsy Shop For Your Handmade Jewellery Business
- Creating A Brand For Your Handmade Jewellery Business
- Branding Your Jewellery Business
- 11 Marketing Tips For Your Handmade Jewellery Business
- 16 Website Tips For Your Handmade Jewellery Business
- Choosing A Brand Name For Your Handmade Jewellery Business
- Creating A Logo For Your Jewellery Business
- How To Price Your Handmade Jewellery
- Top Tips For Designing A Business Card For Your Handmade Jewellery Business
- Sending Newsletters For Your Handmade Business
- How To Run A Social Media Giveaway For Your Handmade Jewellery
- How To Work With Influencers To Sell Your Handmade Jewellery
- 3 Ways To Measure A Customer's Ring Size As A Jeweller
- The Handmade Jewellery Business Christmas Checklist
- 26 Blog Post Ideas for Jewellery Makers
- 4 Ways To Refresh Your Handmade Business
- Top Tips For Selling Handmade Jewellery Online With Carole Allen
- 15 Tips To Stay Safe In The Workshop


