2 Ways To Apply Liver Of Sulphur
Hi, my name is Marena and I am the creator and crafter of Fabled Silver.
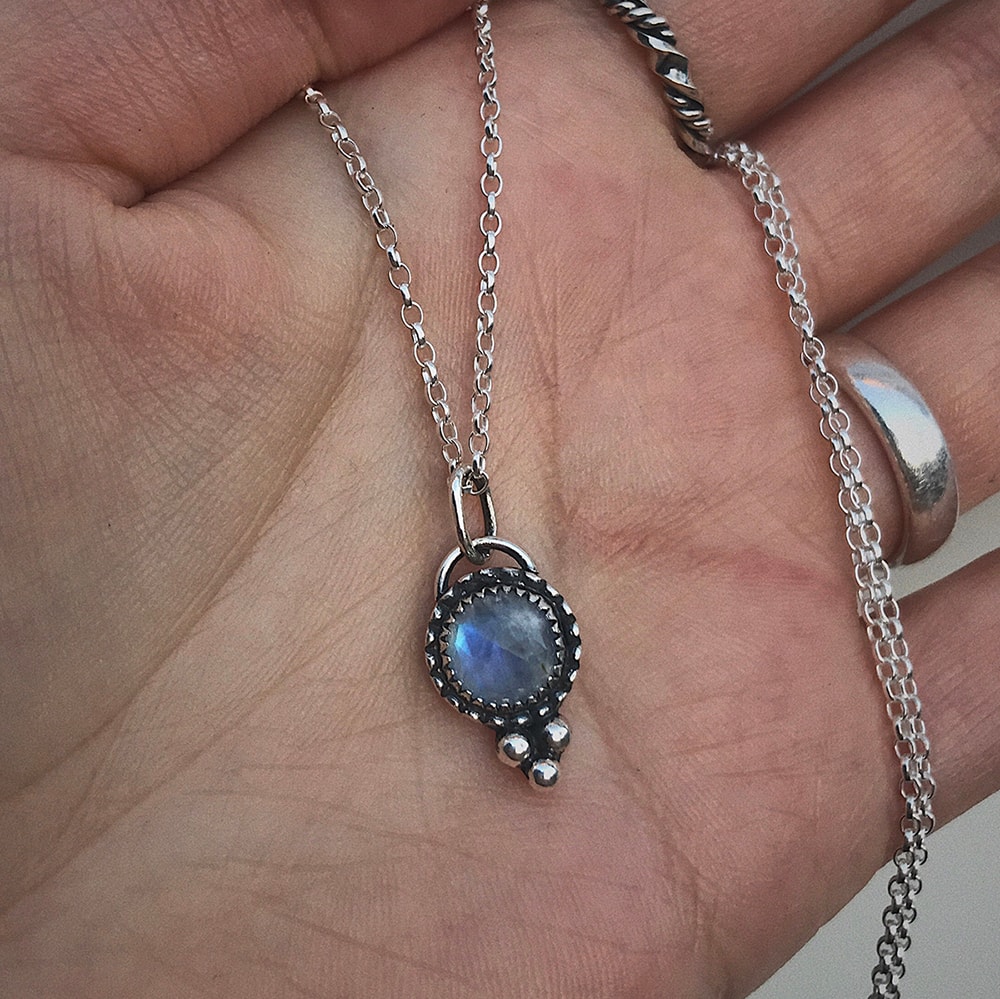
I first learned about patina and liver of sulphur (further referred to as ‘LOS’) on Silver Diploma Course at London Jewellery School. Ever since then, I have not been able to exclude this technique from my jewellery making, as applying liver of sulphur to my jewellery pieces creates such an amazing contrast, that perfectly accentuates the deeper parts of the surface and is wonderfully eye-catching. It’s especially beautiful when combined with colourful gemstones.
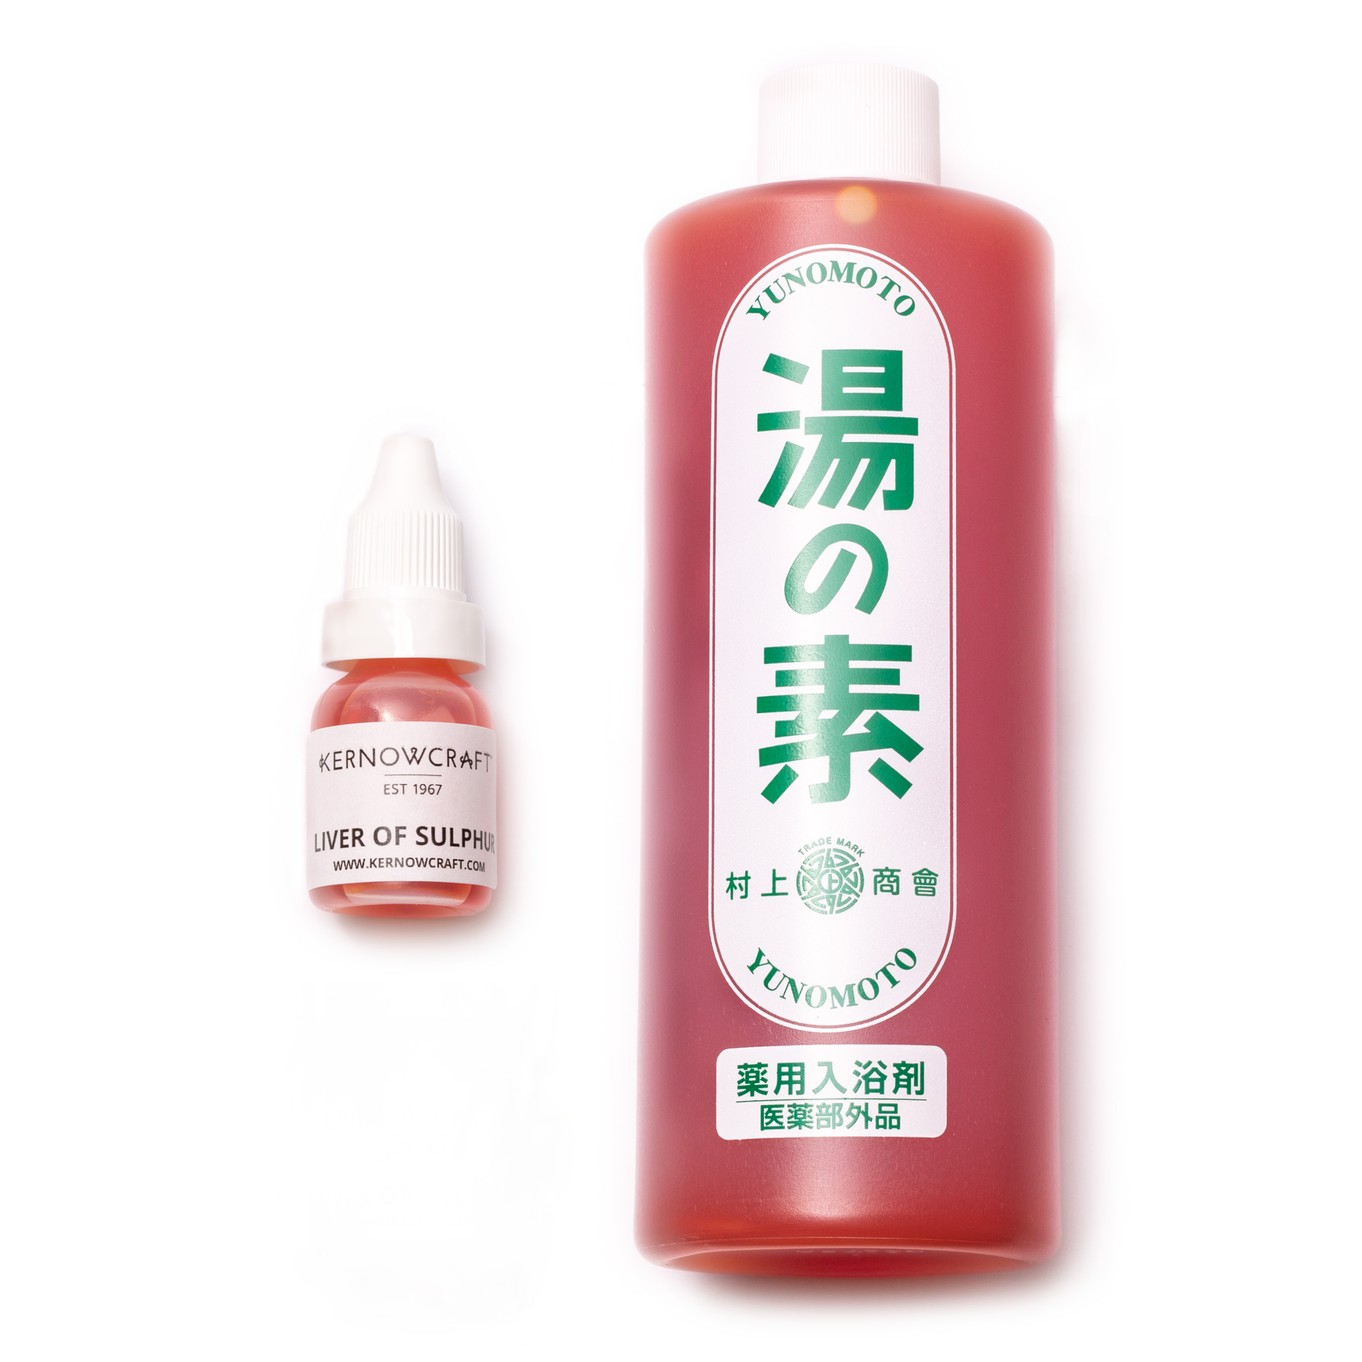
I bought the trial sized liver of sulphur patina solution from Kernowcraft to try it out at home after finishing my diploma course.
I love that this formulation is non-toxic. Finding and holding onto different environmentally friendly alternatives in my jewellery making is extremely important to me. Just like using recycled silver, for example.
So, what exactly is liver of sulphur?
It is a chemical compound containing potassium sulphide and is used in metalworking to create antique-looking patinas on silver, copper, bronze, metal clays and, after a little surface preparation work, on brass and gold. It’s available in both liquid and solid state. It is bright yellow when diluted and has a strong smell that resembles rotten eggs.
You can create many colours with liver of sulphur. However, in this
I will show you two techniques, one of which will require you to fully immerse your jewellery piece into a hot, diluted liver of sulphur solution. The other will explain how to apply liver of sulphur with a brush. There are many ways to use liver of sulphur and this tutorial only shows my personal preference and techniques that seem to work best for me. I hope that at the end of this tutorial you will feel more confident in using liver of sulphur and will be inspired to experiment with different techniques, textures and finishes on your own creations!
The main thing though – safety first. So, ensure you’re always careful and suited up before starting this process.
Good luck and enjoy experimenting!
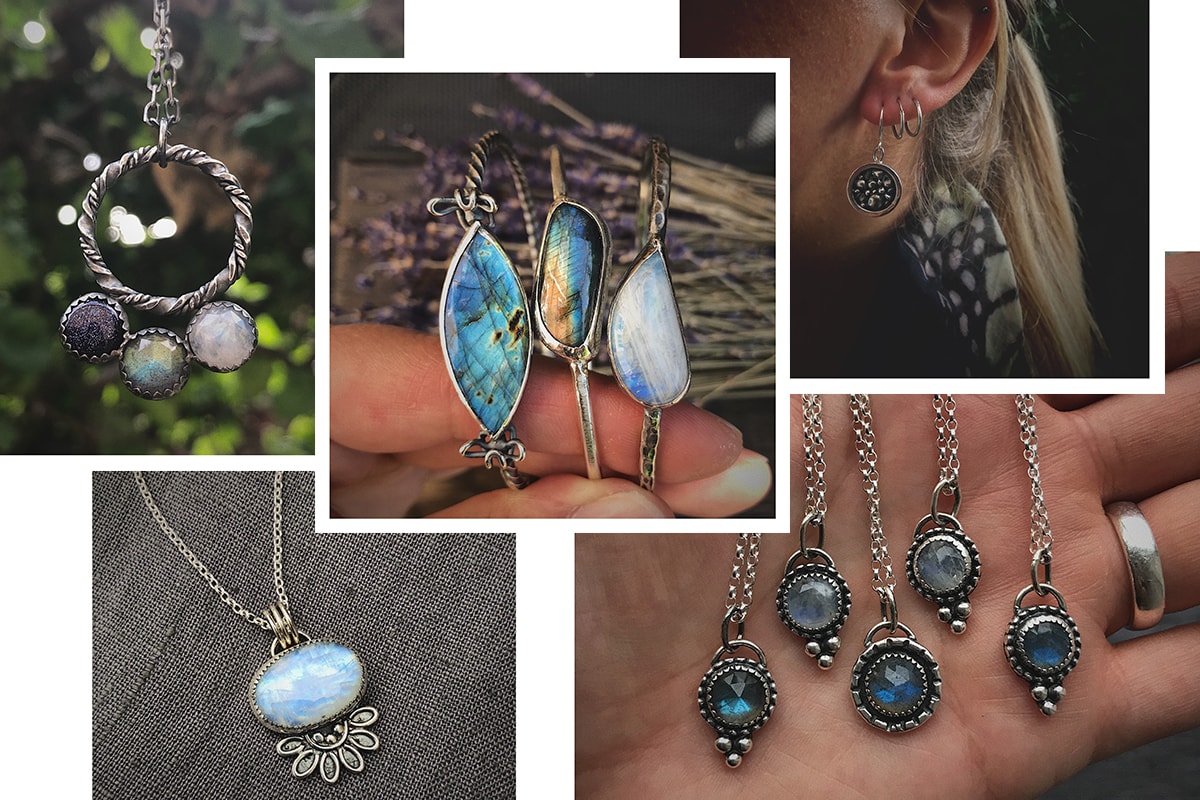
Examples of Maren's beautiful jewellery designs using liver of sulphur
Supplies You Need...
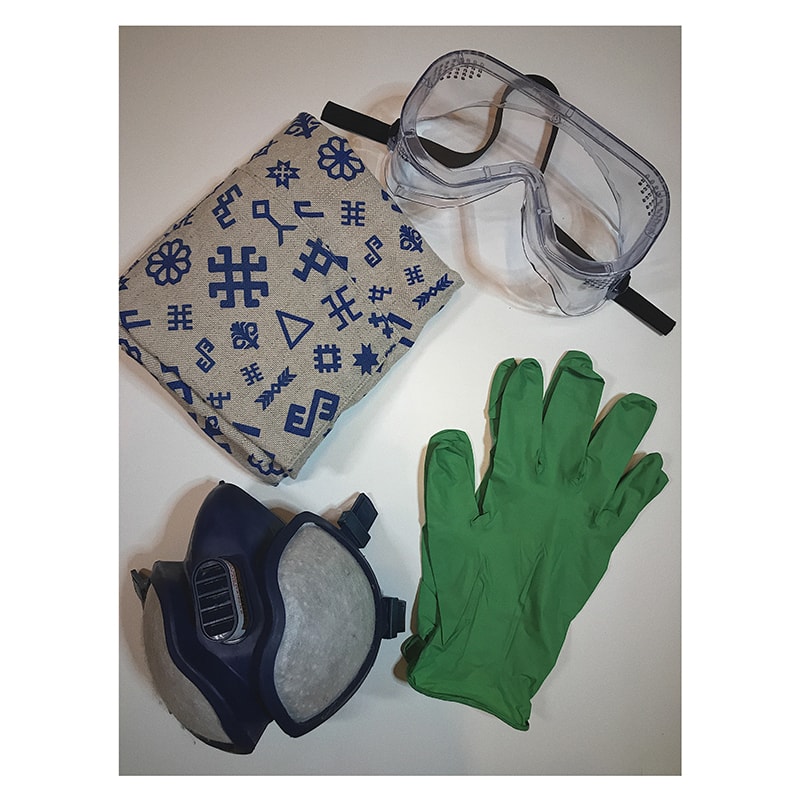
Safety Equipment
- Safety goggles – these are very important, as the liver of sulphur solution can irritate your eyes
- Work apron – liver of sulphur leaves bright yellow stains when comes in contact with
fabric - Respirator – prolonged exposure to liver of sulphur smell can cause
headaches and dizziness
Disposable gloves – to protect your skin from smells (and your eyes if you suddenly forget you had some solution on your fingers and start rubbing your eyes – trust me, it stings!)
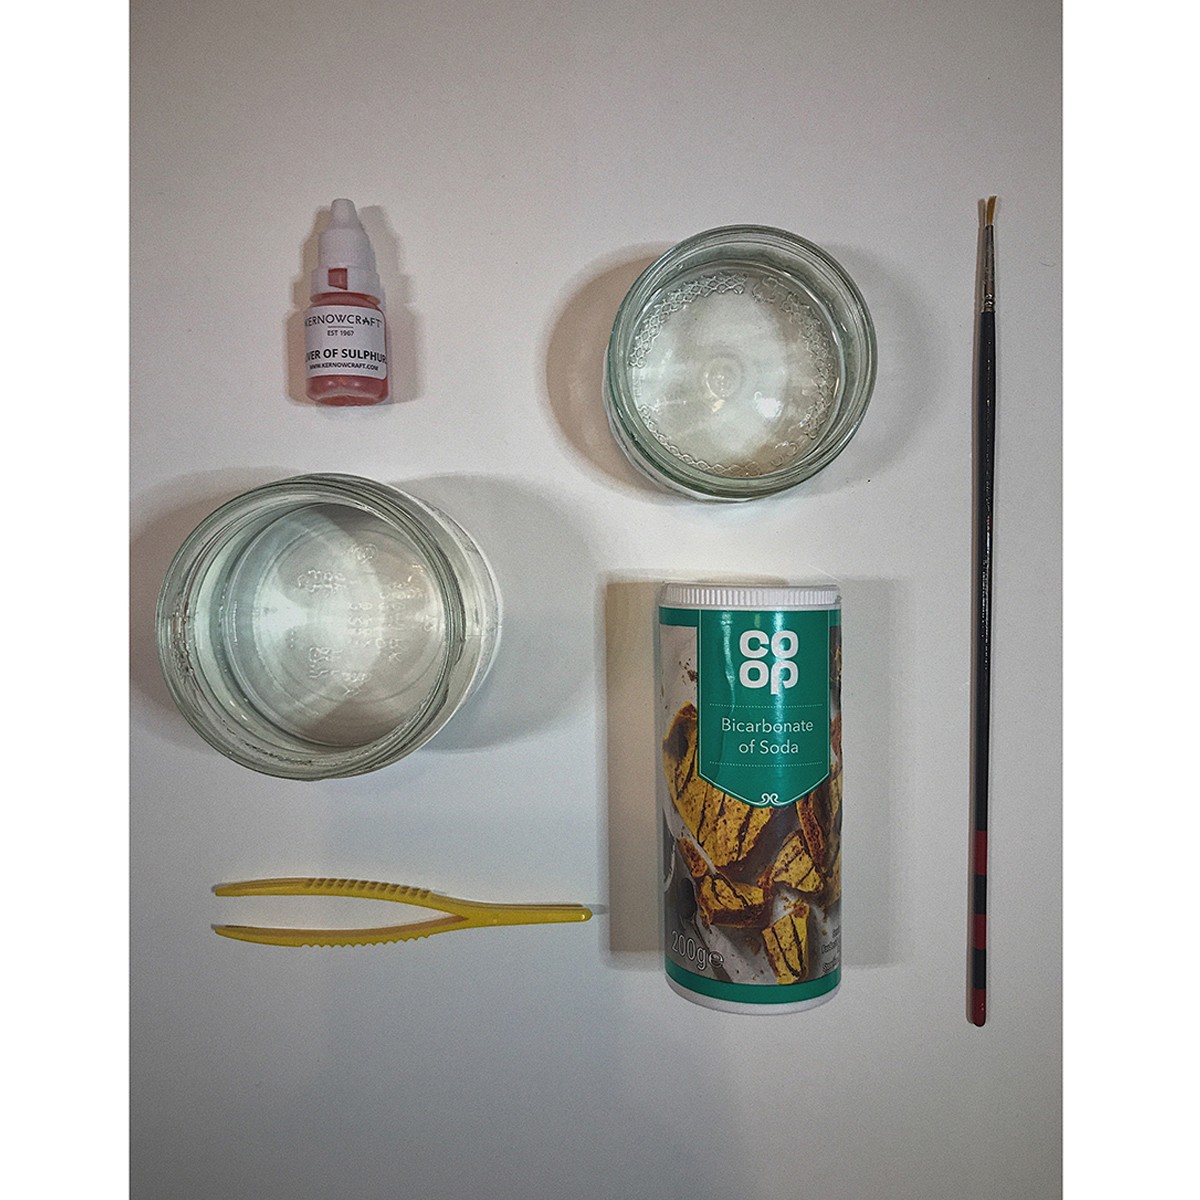
Tools & Supplies
- Liver of sulphur solution
- A small glass jar with approx. 250ml hot (not boiling) water
- A small glass/plastic container of cold water (approx. 250ml)
- Baking soda
- Plastic tweezers
- Brush (optional, depending on the technique used)
- Torch/hair dryer (optional, depending on the technique used)
- Jewellery ‘third hand’ (optional, depending on the technique used)
Silver jewellery of your choice
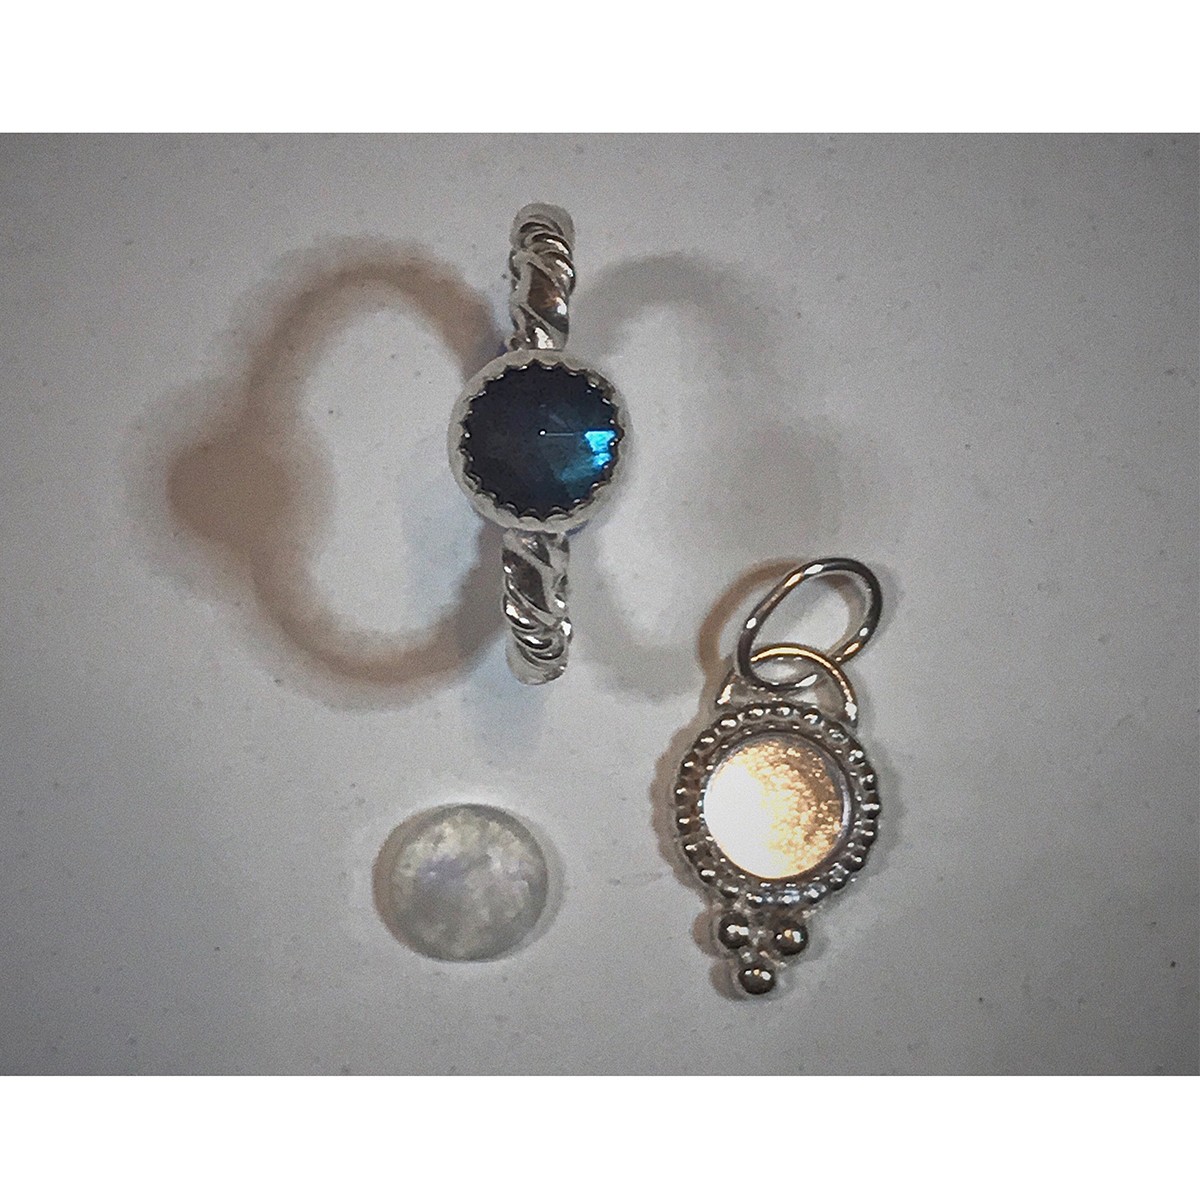
I have chosen to create a patina on one of my moonstone pendants and a ring I made previously with a clean finish but later realised it needed patina to bring out its texture.
Method 1: The Hot Water Method With Liver Of Sulphur
This method is perfect for pieces that need to be covered with patina all over and have no gemstones.
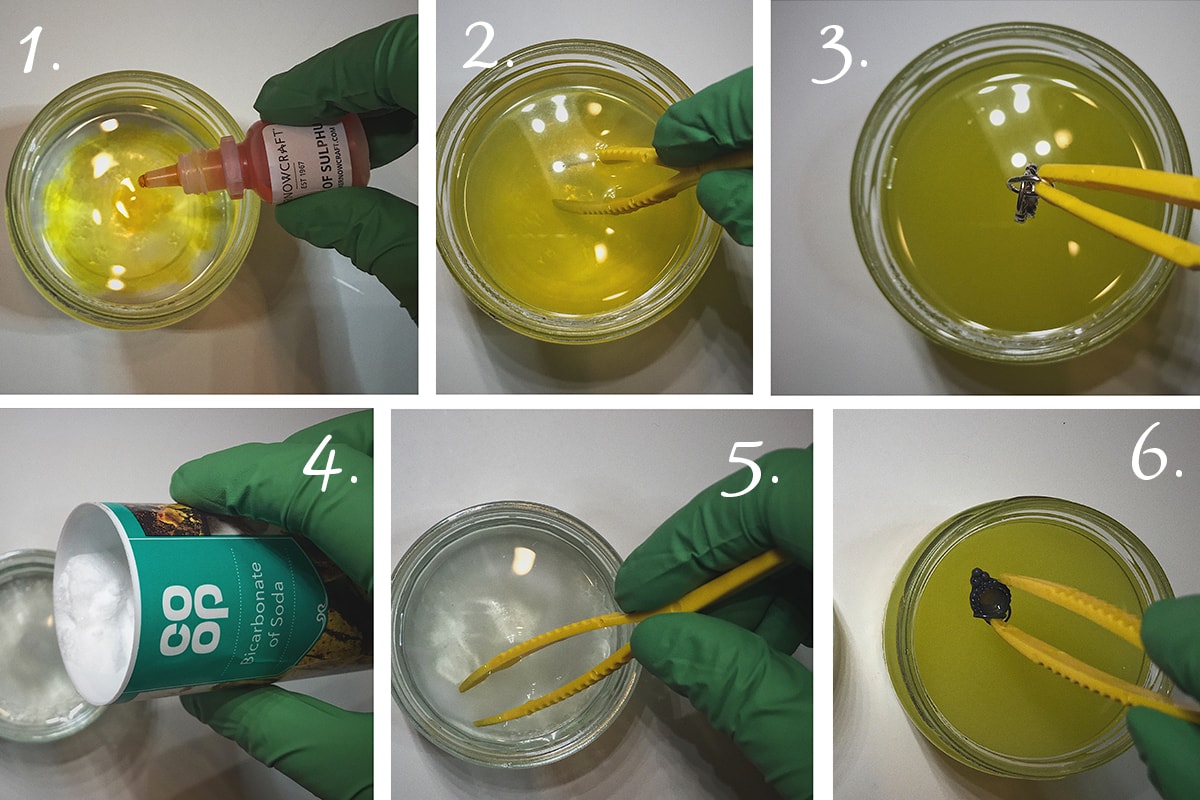
1. Apply 10 drops of liver of sulphur into the hot water jar.
2. Mix the liver of sulphur into the water using plastic tweezers.
3. Carefully drop your piece into the mixture and leave for a few minutes.
4. While your metal piece is oxidising, put about a teaspoon’s worth of baking soda into the jar with cold water.
5. Stir well, using either the teaspoon or plastic tweezers until the baking soda has dissolved.
6. When a few minutes have passed and you feel satisfied with the colour of your piece, transfer it from the liver of sulphur mixture into the baking soda solution.
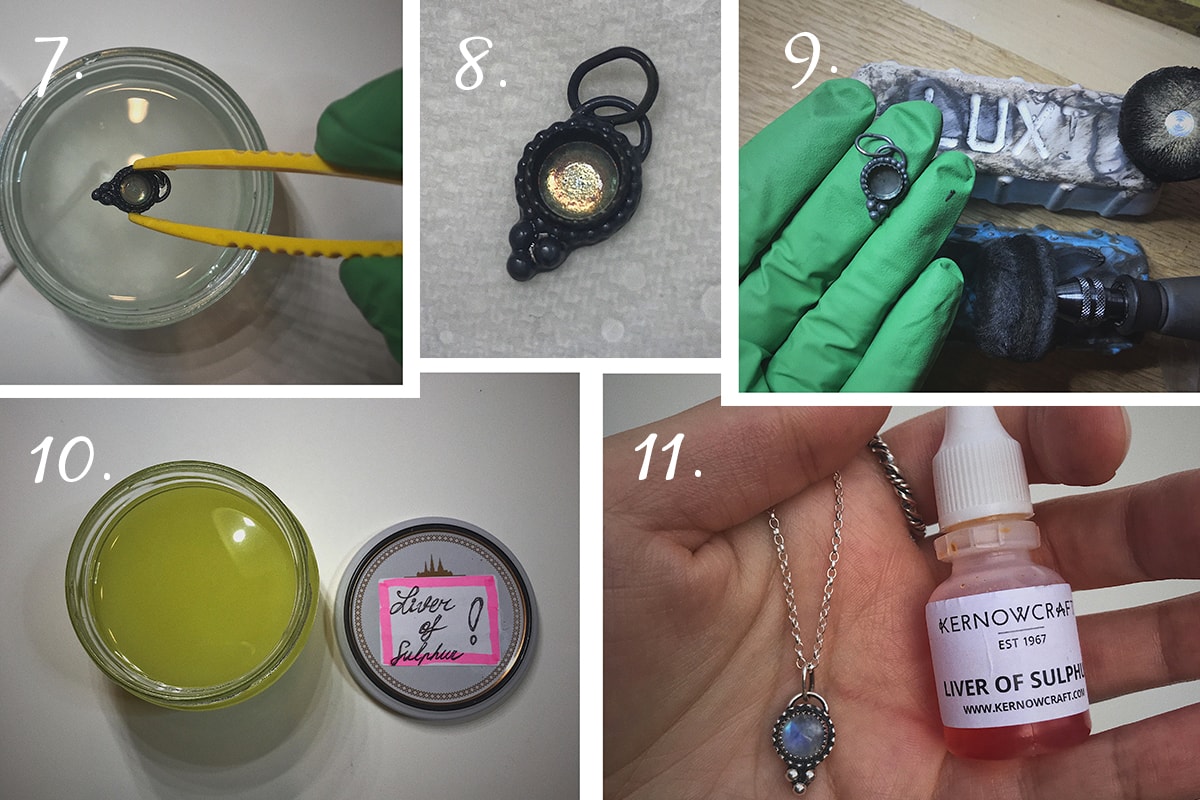
7. When a few minutes have passed and you feel satisfied with the colour of your piece, transfer it from the liver of sulphur mixture into the baking soda solution.
8. Swirl the piece around for a few seconds or leave it in for a minute. The baking soda reacts with the liver of sulphur and stops it from developing further.
9. Take the piece out of the baking soda mixture, rinse with soapy water and leave on a towel to dry.
10. Once the piece is dry, you can polish it to your desired standard. I always use my Dremel 4000 Multi tool with LUXI bars and have found them to do the job perfectly. I start with the blue bar together with a felt wheel, then wash off the residue with soapy water and a brush. Then do the same with a white bar and a leather wheel. However, a polishing cloth will suffice. Just ensure you don’t use anything abrasive, as it will make the finish look dull. And of course, you can now also set stones.
11. Once you have finished with the newly mixed liver of sulphur solution, you can close the jar with a lid, clearly mark it (so it’s not confused for orange juice) and leave it in a cool, dark place. It will remain active for a few days. However, it will become weaker. You will still be able to use it as long as it’s bright yellow, you’ll just need to heat up the metal piece before putting it into the solution next time.
Method 2: Applying Liver Of Sulphur With A Brush
This method is great for applying patina to certain spots of your jewellery or if you have already set a stone into your work and have later decided to add patina.
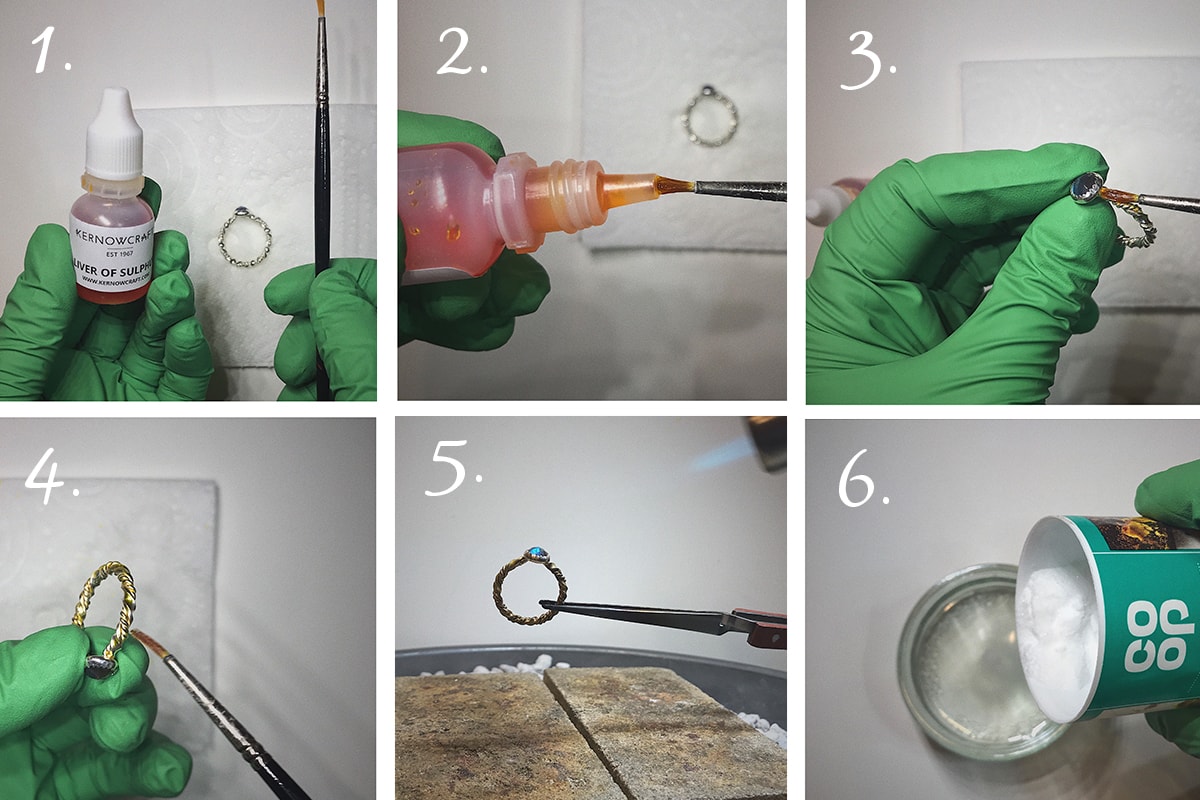
1. You will need a brush and the liver of sulphur solution to start with.
2. Apply a drop of the solution onto the brush.
3. Carefully apply the solution onto your piece with a brush, avoiding any set stones.
4. Ensure that you have covered all the desired parts of the piece and have applied the solution into all the crevices of the texture, as any missed areas will be very noticeable once it’s finished.
5. Once you’re happy with the liver of sulphur coverage, you will need to heat the piece slightly to accelerate the chemical process of the solution. You should be very careful with this step, as too much heat can melt the metal in your work or cause breaks and discoloration in the stone. To protect your hands from the jewellery becoming hot, place it into a third hand and use either a hand torch or a hair drier on the lowest setting. Remember, you must only warm up the solution, not boil it.
6. After heating the jewellery piece, leave it to cool by itself, still in the third hand. It shouldn’t take too long, as the metal from the third hand will absorb most of the heat from your jewellery. Whilst you’re waiting for it to cool, prepare the liver of sulphur neutralising solution by mixing about a teaspoon’s worth of baking soda into the jar with cold water.
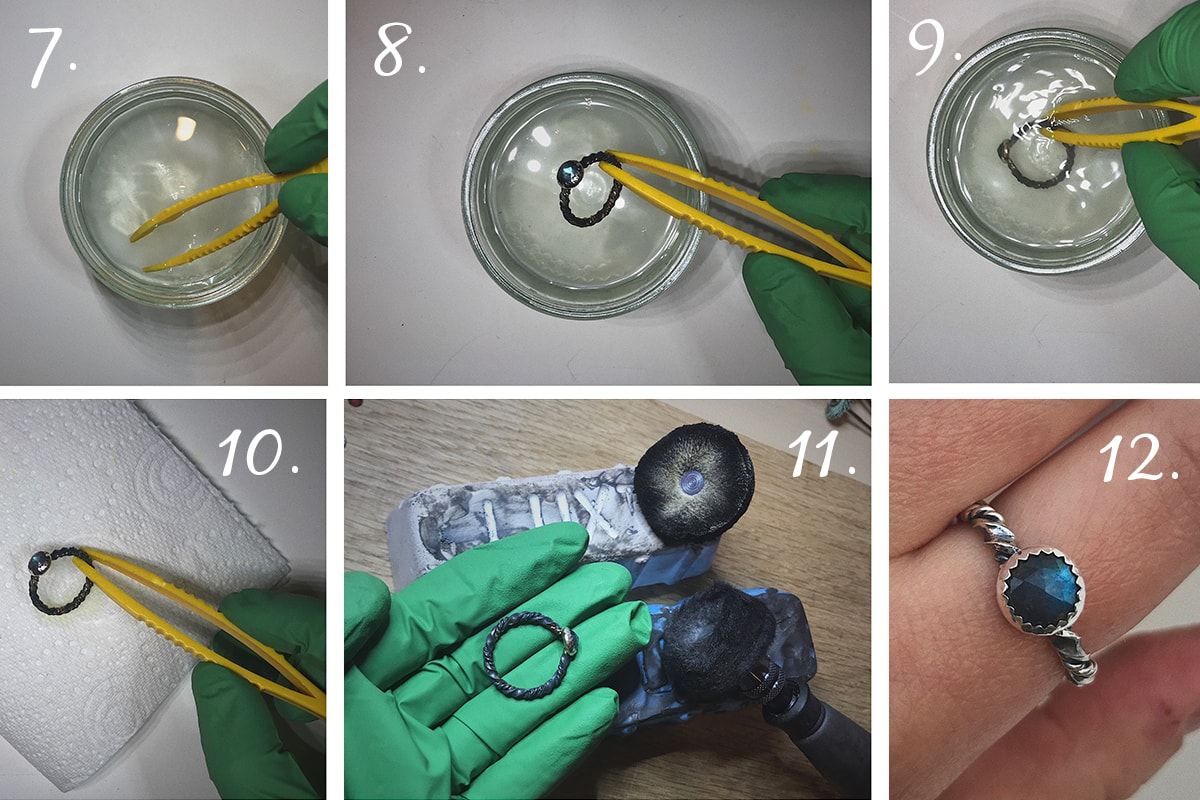
7. Stir well, using either the teaspoon or plastic tweezers until the baking soda has dissolved.
8. When the jewellery piece is cool to touch, take it out of the third hand and place it into the baking soda solution.
9. Swirl the piece around for a few seconds or leave it in for a minute. The baking soda reacts with the liver of sulphur and stops it from developing further.
10. Take the piece out of the baking soda mixture, rinse with soapy water and leave on a towel to dry.
11. Once the piece is dry, you can polish it to your desired standard. I always use my Dremel 4000 Multi tool with LUXI bars and have found them to do the job perfectly. I start with the blue bar together with a felt wheel, then wash off the residue with soapy water and a brush. Then do the same with a white bar and a leather wheel. However, a polishing cloth will suffice. Just ensure you don’t use anything abrasive, as it will make the finish look dull. And of course, you can now also set stones.
12. The finished result.
Top Tips With Working With Liver Of Sulphur
- Ensure that your metal piece is completely cleaned, polished and free from grease and lacquers. It should basically look finished, as if you weren’t going to oxidise it.
- The temperature of liver of sulphur and the piece of metal will affect how fast the colours of the patina develop. The hotter it is, the more quickly the colours will move from shade to shade. They progress roughly as follows: gold, pink, magenta, blue, purple, bronze, grey, and black.
- Liver of sulphur is great for not only the metal itself, but also for enhancing the colour of semi-precious gemstone cabochons, such as moonstone and labradorite, as some stones might not be as striking on their own. The idea is that the bezel base is oxidised to make it black, so that when the stone is set, it appears a little darker, thus enhancing its colour. Before you set a stone into an oxidised bezel, try putting the stone on a dark vs light surface to see if oxidation can make a change to better or worse, as in most cases a stone benefits from the light hitting through the stone onto the shiny silver base.
- If you intend to oxidise a piece with a gemstone, it’s best to set the stone afterwards. You can still oxidise pieces with stones already set in, however, in that case I would recommend carefully using the brush method. Never apply liver of sulphur to gemstones, as they will get damaged.
- It’s best to oxidise many pieces of jewellery together to save time and make the most of your liver of sulphur solution, as it quickly loses its potency with exposure to air and moisture. If a prepared batch of liver of sulphur turns a milky/clear colour it will most likely be ineffective. It can be safely disposed of down the drain. Ensure that you flush the pipes with water afterwards.
- liver of sulphur is a patina, and in general, patinas are not permanent. If not treated or finished, the effect will wear off over time. You should not have a problem in crevices, but “high” areas are more prone to being brushed or rubbed, especially on rings. That can be helped by applying some Renaissance Wax or Midas Lacquer onto your piece.
- Ensure that all your brushes, containers and similar items used with liver of sulphur are exclusive for that purpose only, as the remaining liver of sulphur residue will colour all metals.
- Not all experiments are successful, so in case if you wish to remove the patina, you can either heat up your piece (unless it has gemstones), use a store bought tarnish remover or try this trick: line a plastic or a heat-resistant glass bowl with aluminium foil, add the tarnished jewellery piece, cover with boiling water, and sprinkle with baking soda. The baking soda should start to bubble, and the tarnish will settle onto the aluminium. When the water cools and the bubbling stops, the piece should be shiny. Repeat this process for deeper crevices. When finished, rinse the piece well with soapy water.
Also in this section:
- Guide To Sanding & Polishing For Jewellery Making
- Hand Polishing Your Jewellery With Polishing Papers
- A Guide To Texturing Metals For Jewellery Making
- Top Tools For Making Textures On Metal
- Beginner's Guide To Chasing & Repoussé
- How To Make Easy Textured Earrings
- How To Make A Hammered Copper & Silver Heart Pendant
- How To Make A Textured Cuff Bracelet
- How To Make A Metal Leaf Decoration
- How To Use Doming Block & Punches For Jewellery Making
- How To Make Domed Metal Earrings With A Doming Block
- How To Engrave Your Drawings On Art Clay Copper
- Textured Washer Bracelet Tutorial With Guest Jeweller Laura Grey
- Barrelling Machine For Polishing Metal - Everything You Need To Know
- Tumbling Machine For Polishing Stones and Glass- Everything You Need To Know
- Polishing Jewellery Q&A With Stephen M Goldsmith
- Town Talk Products For Cleaning & Caring For Jewellery
- Creating A Resin Bird Pendant With Designer Sarah Hoare
- VIDEO: How To Create Patina With Liver Of Sulphur
- 2 Ways To Apply Liver Of Sulphur
- VIDEO: How To Use Silver Plating Solution
- How To Clean & Prevent Tarnished Jewellery
- Why You Need Anti Tarnish Paper Strips
- How To Use Midas Finish Seal Lacquer
- How To Use Renaissance Wax To Prevent Tarnished Jewellery
- VIDEO: Working With Crinkle Metal Sheet
- A Guide To Using Mokume Gane Metal For Jewellery Making
HAVE A QUESTION?
If you have any questions, feel free to get in touch with our friendly team who will be more than happy to give you advice over email or on the phone.
You can learn more and find inspiration by visiting our Jewellery Making Tutorials, Jewellery Making Kits and YouTube Channel. Don't forget to follow us on social media and tag us in your designs on Instagram & Facebook, we would love to see!

