How To Make A Tree Of Life Pendant With Ellie Gallagher
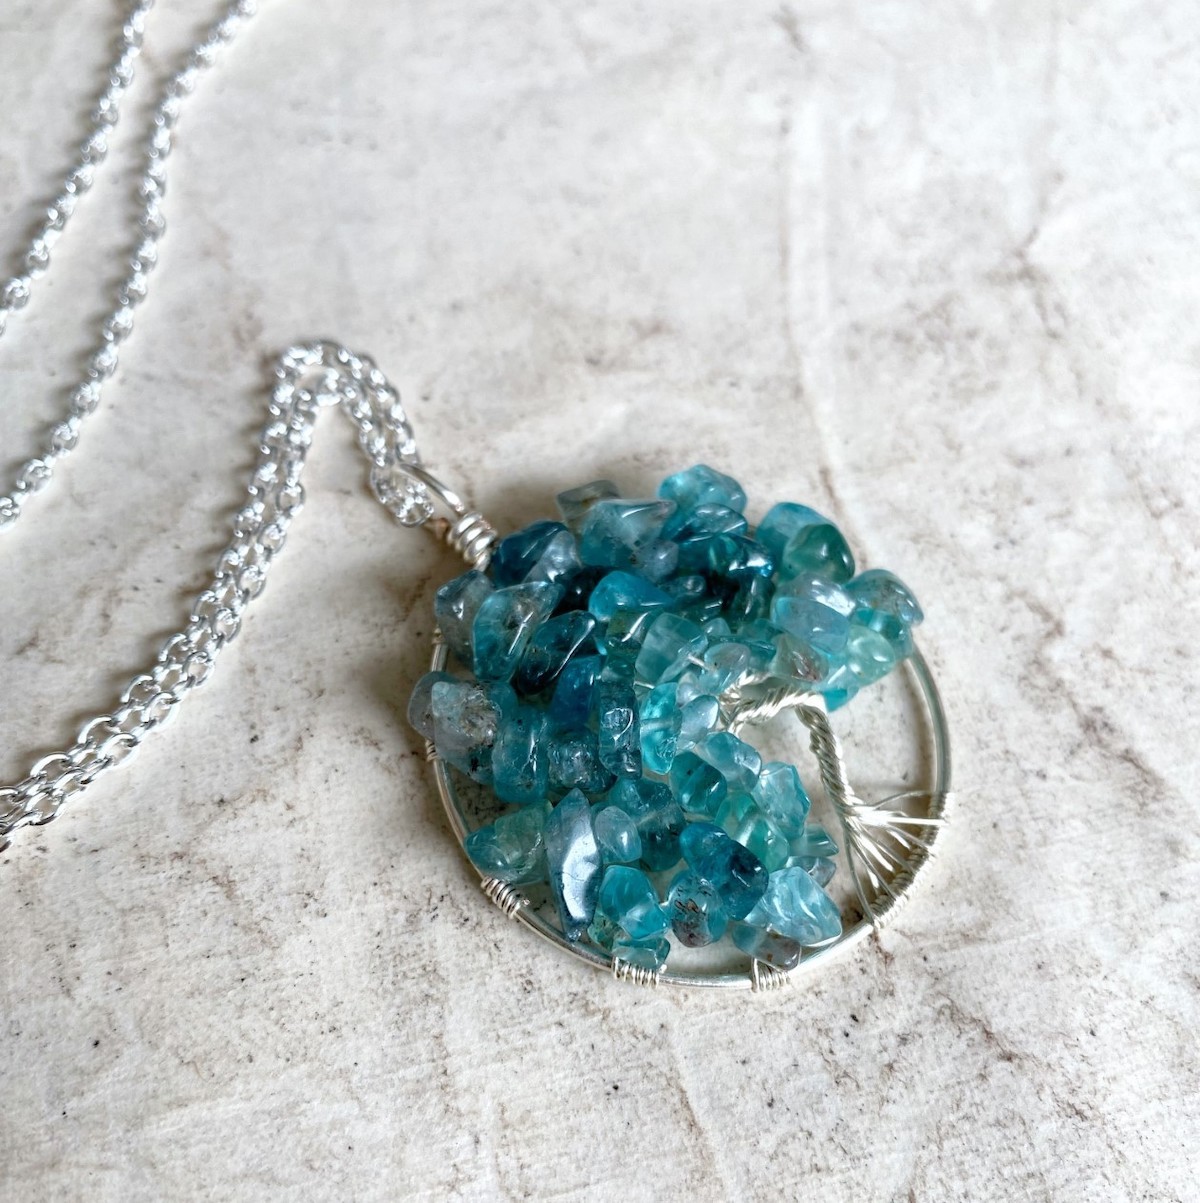
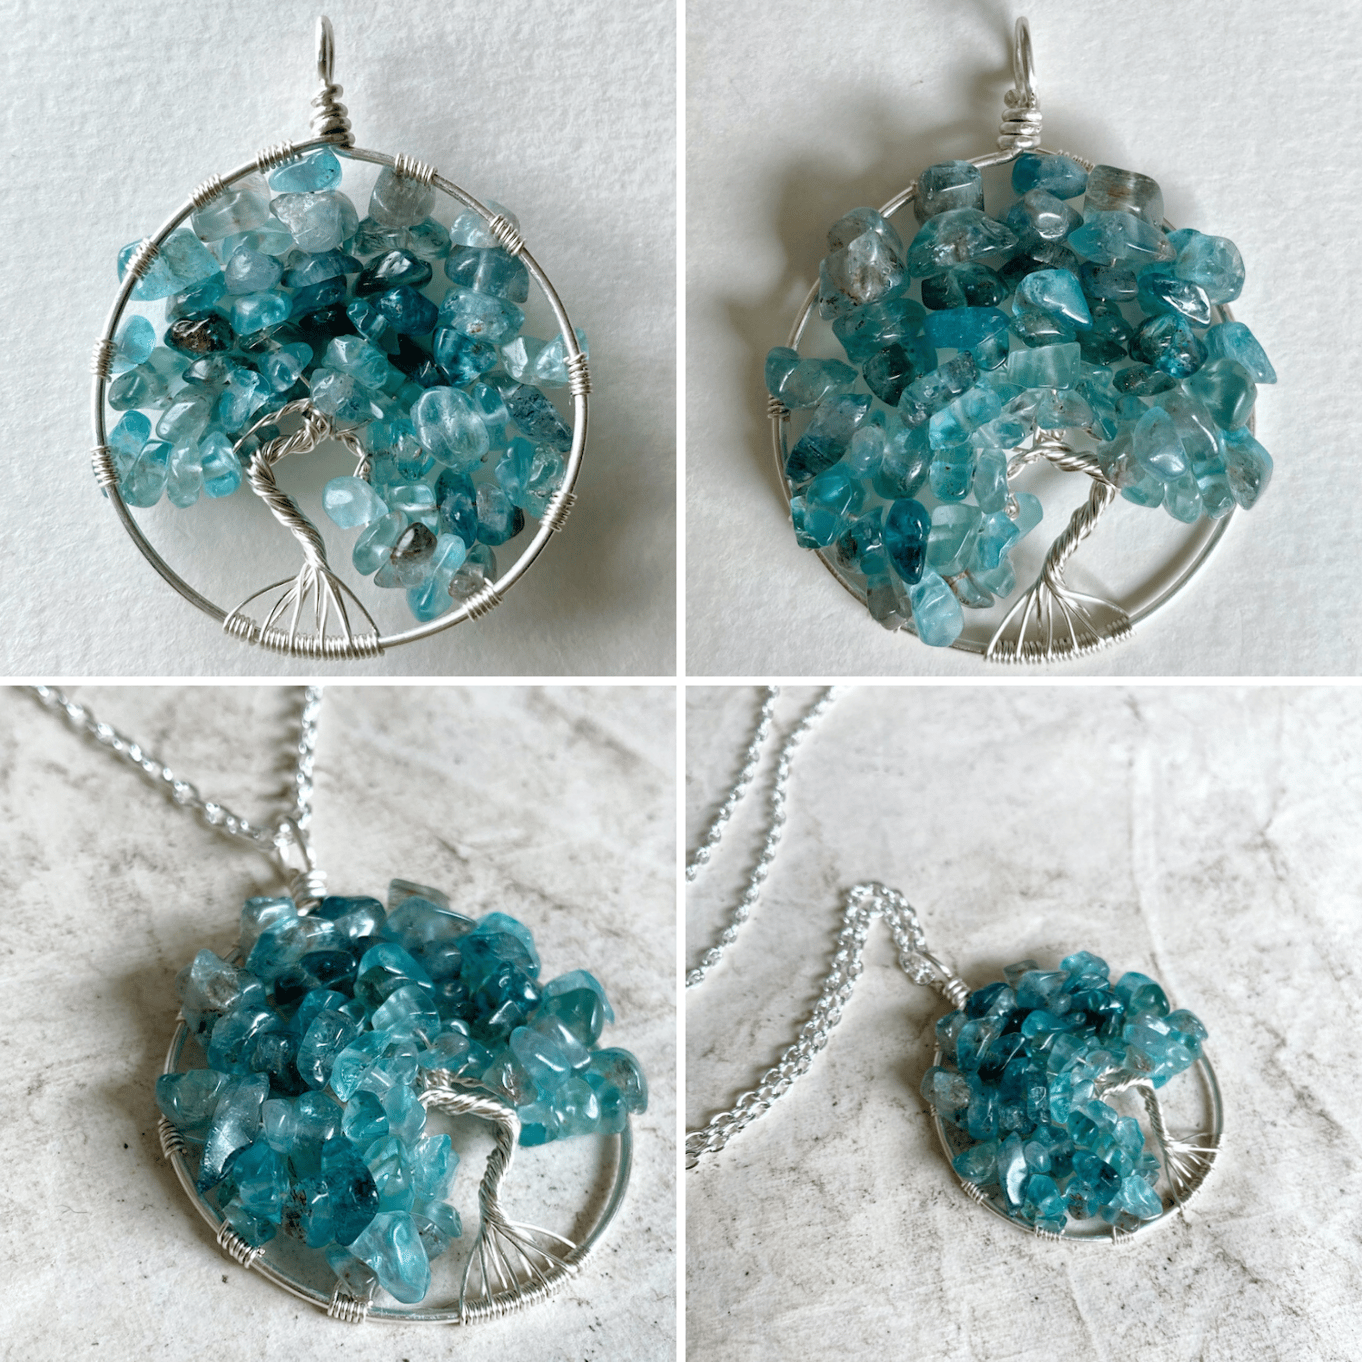
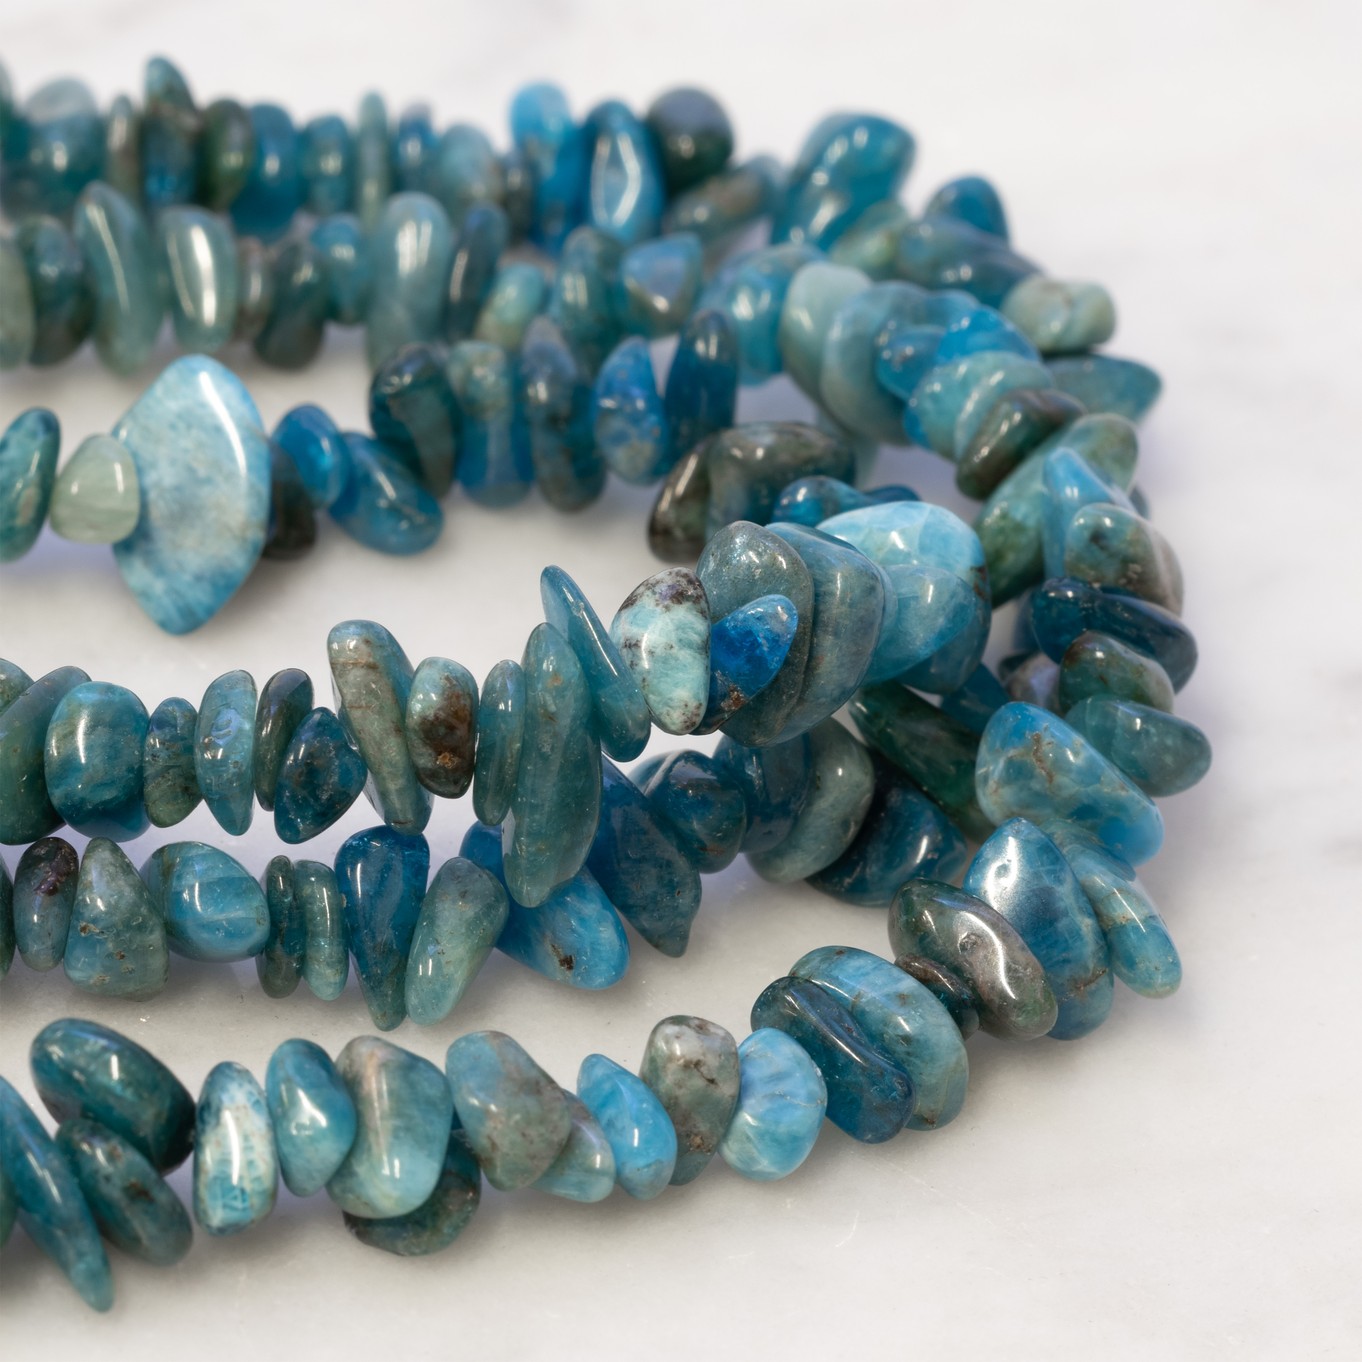
Ellie from 'Ellie's Handmade Art' shares with you a lovely tutorial on how to make a tree of life pendant, using our beautiful apatite chip beads.
This project can be made using your favourite gemstone beads and your choice of wire, whether that's silver, gold, brass or copper.
Follow along with Ellie's steps below and buy all the tools and supplies you need online to get making. Share and tag us in your tree of life designs over on Instagram and Facebook for a chance to feature!
About Our Guest Tutor, Ellie
Ellie has been making jewellery since 2014, creating intricate wire wrapped designs. Taking inspiration from nature, Ellie creates one of a kind pieces using ethically sourced gemstones and runs a successful Etsy shop, selling her creations.
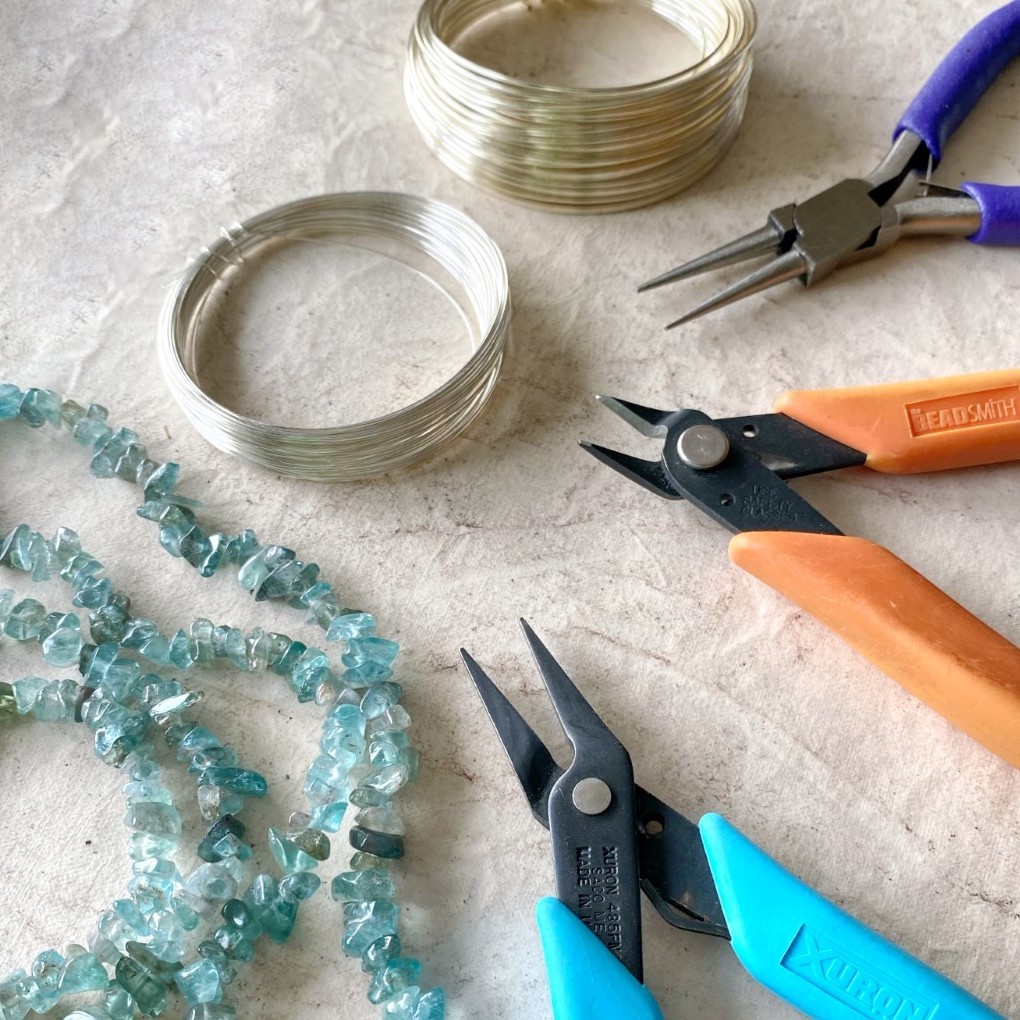
Recommended Tools & Supplies
- Flat nose pliers
- Round nose pliers
- Wire cutters
- Bracelet mandrel (if you don't have one you could use a large cotton reel or even a lip balm pot!)
- 20cm of 1mm (or 0.8mm) wire
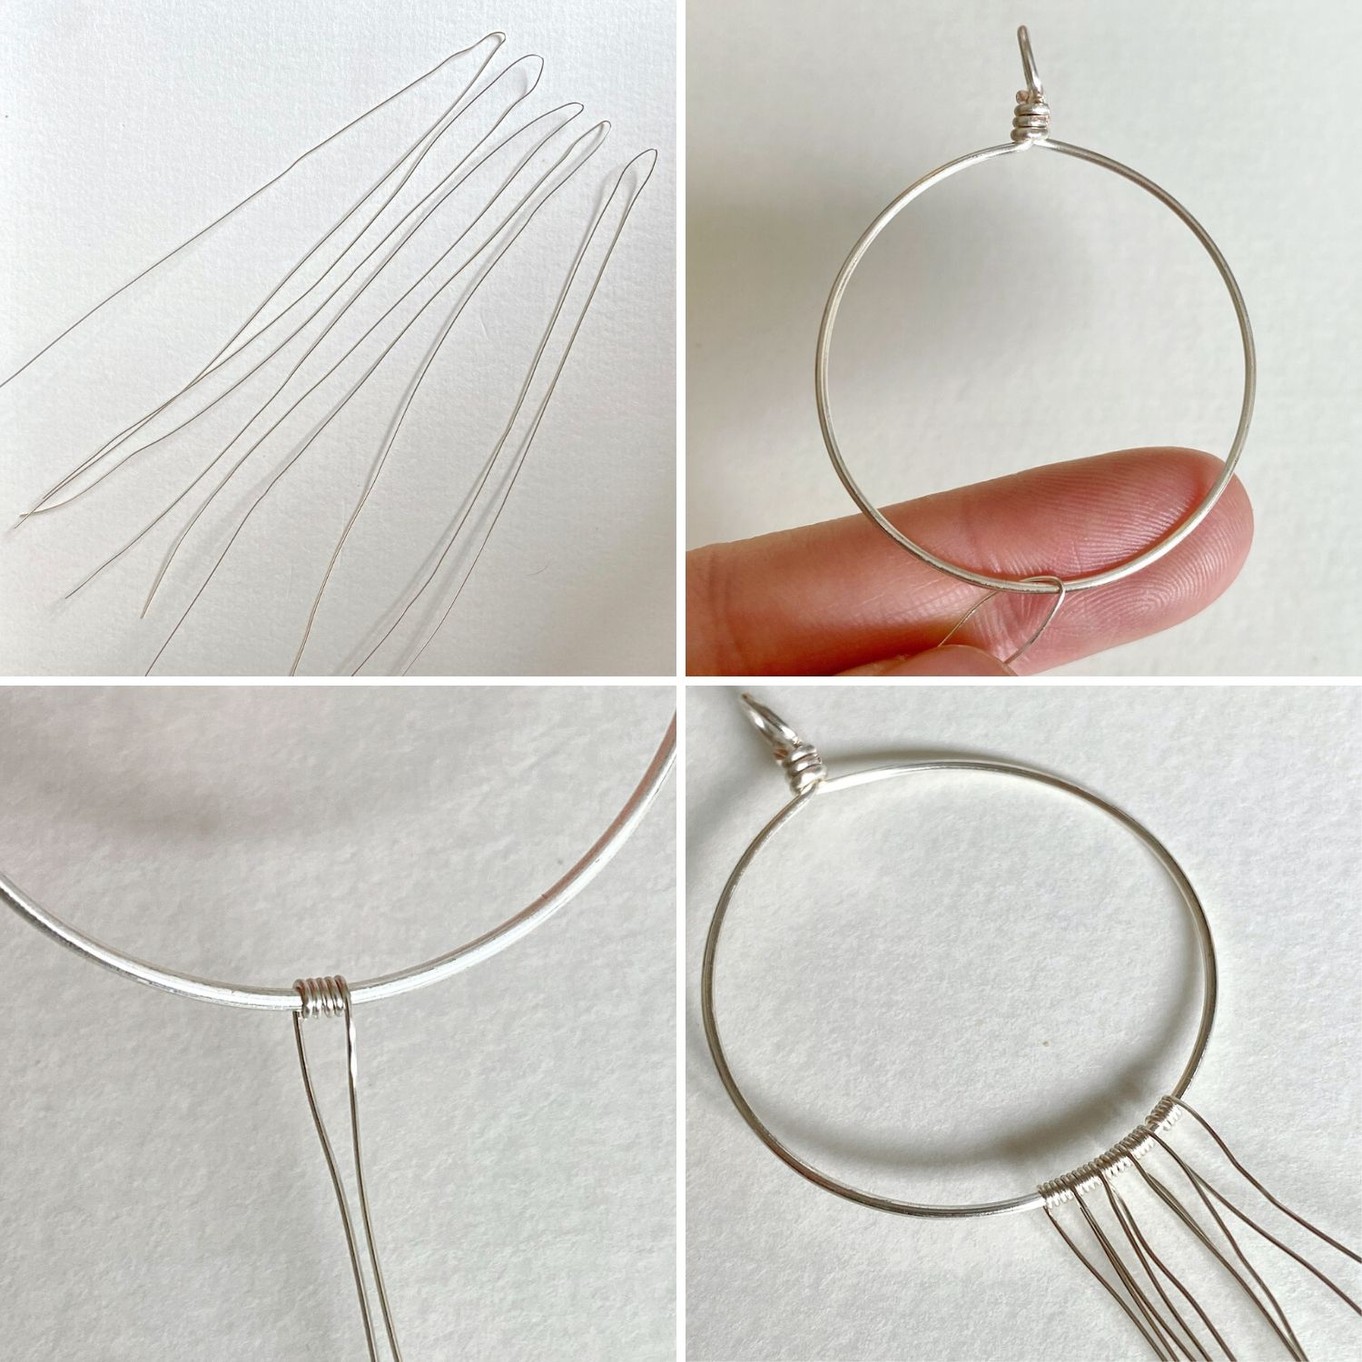
- 5 x 30cm of 0.4mm (or 0.3mm) wire
- Gemstone beads (this project features apatite chip beads) - always check your chosen beads fit the wire comfortably
- Ready made necklet chain or thread
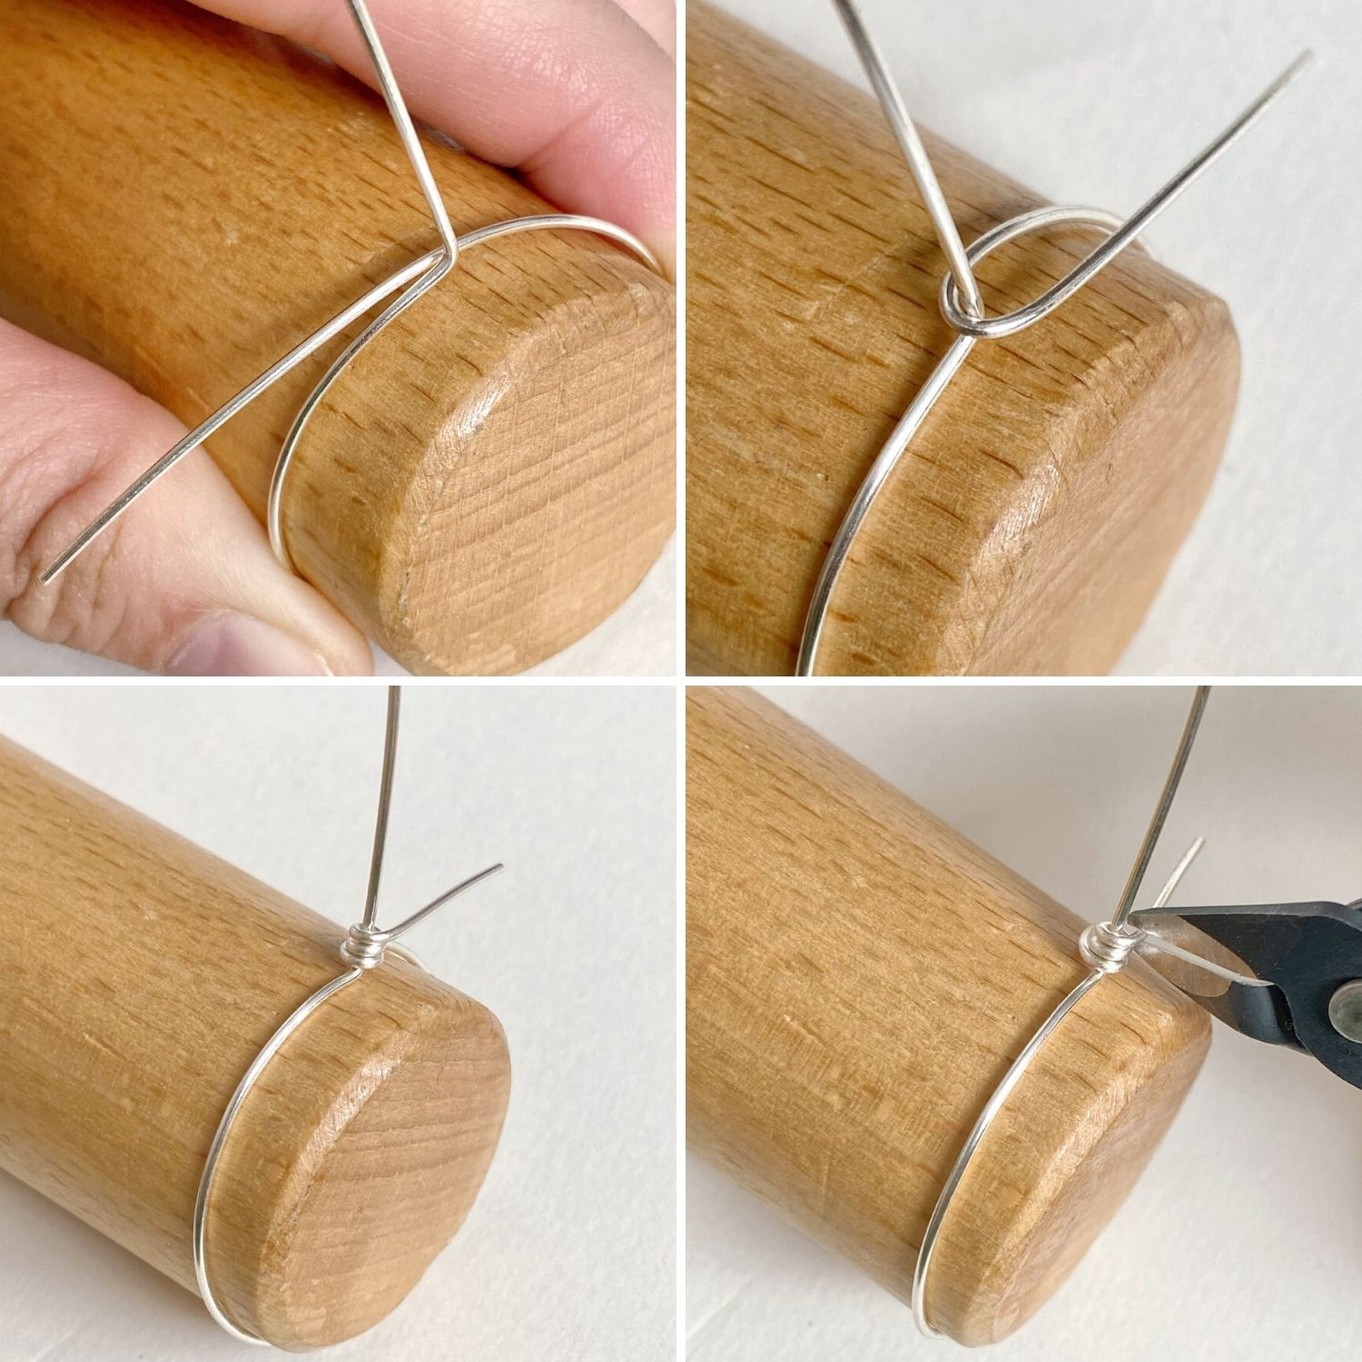
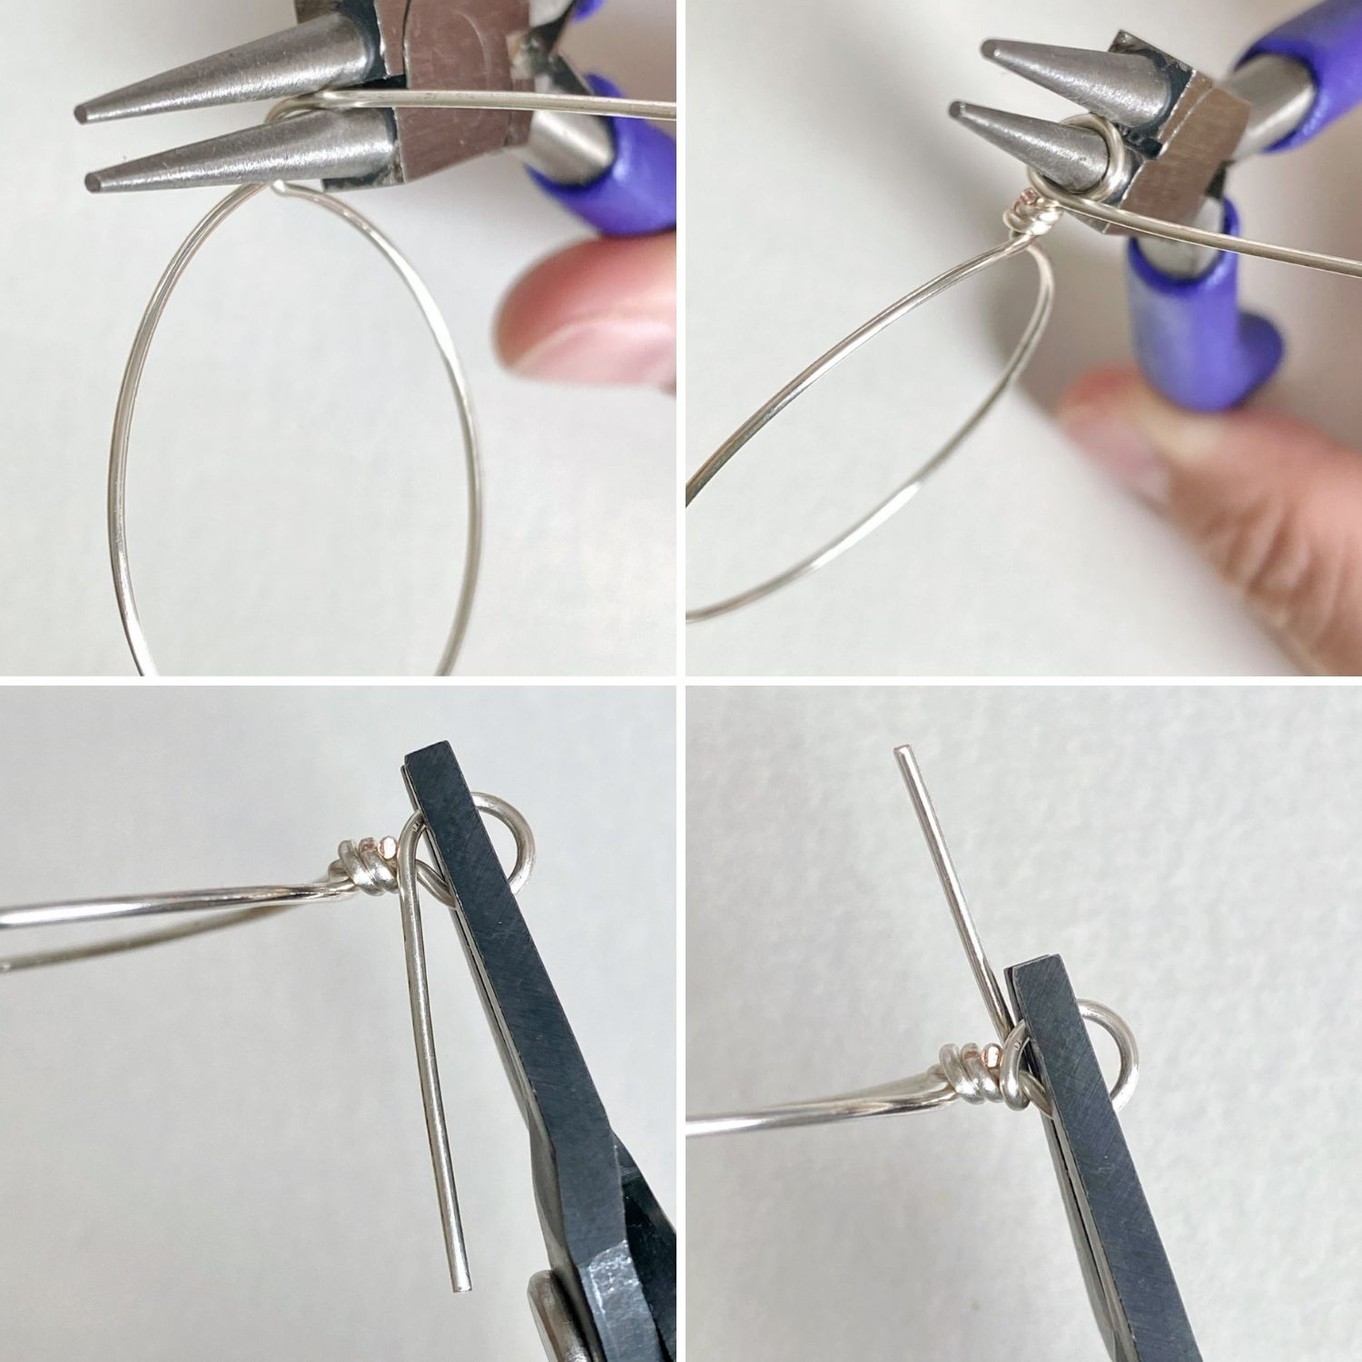
Using your 20cm piece of 1mm wire, wrap around the bracelet mandrel. Where the wires cross, take your flat nosed pliers and create a right-angle bend in one of ends of the wire.
Hold your wires firmly against the bracelet mandrel and with the other end of the wire, wrap around the tall wire piece firmly 2 or 3 times to secure into place, this will create your pendant frame. Using wire cutters, cut the tail off of your wrapping wire leaving the tall wire still standing proud.
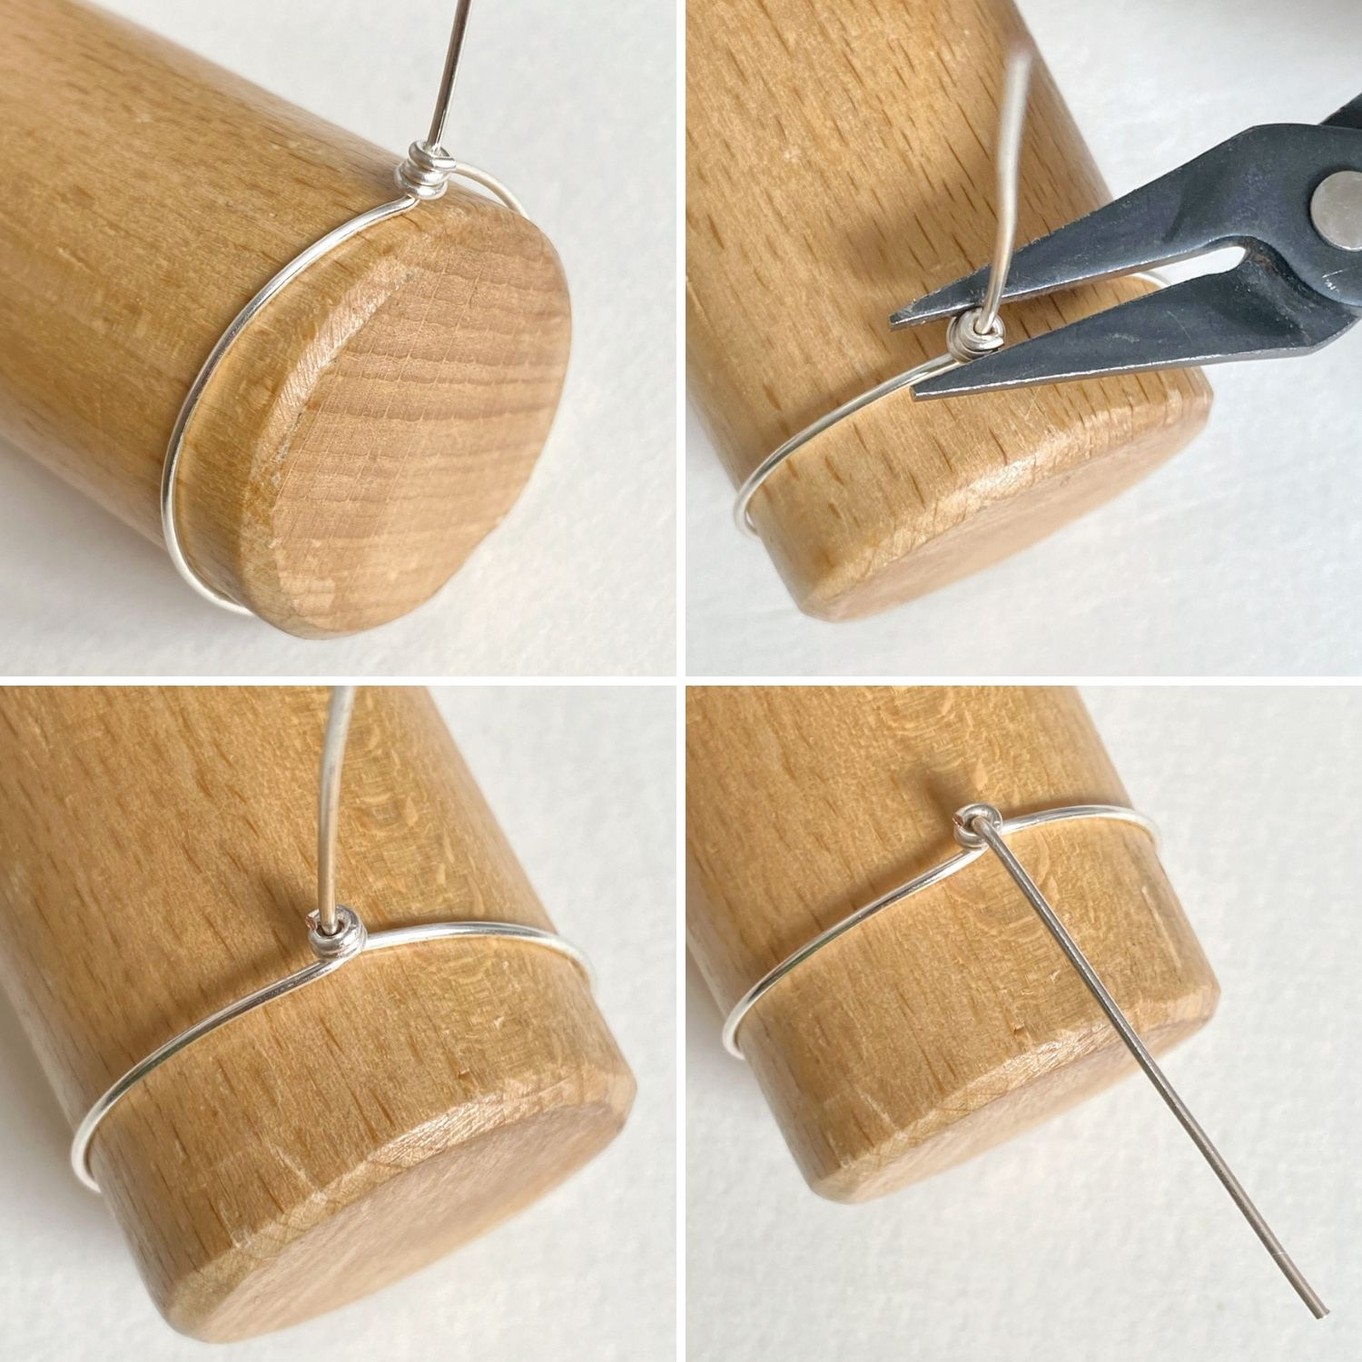
Using flat nosed pliers, gently squeeze the cut wire to sit flush against the tall wire, this will ensure there are no rough edges to catch on clothing etc.
Once you have done this, use your fingers to bend the tall wire down towards the mandrel.
Place round nosed pliers at the base of your wire and wrap around the pliers, you will need to take out the pliers half way round and reinsert them to get a complete full loop. This loop will become your bail.
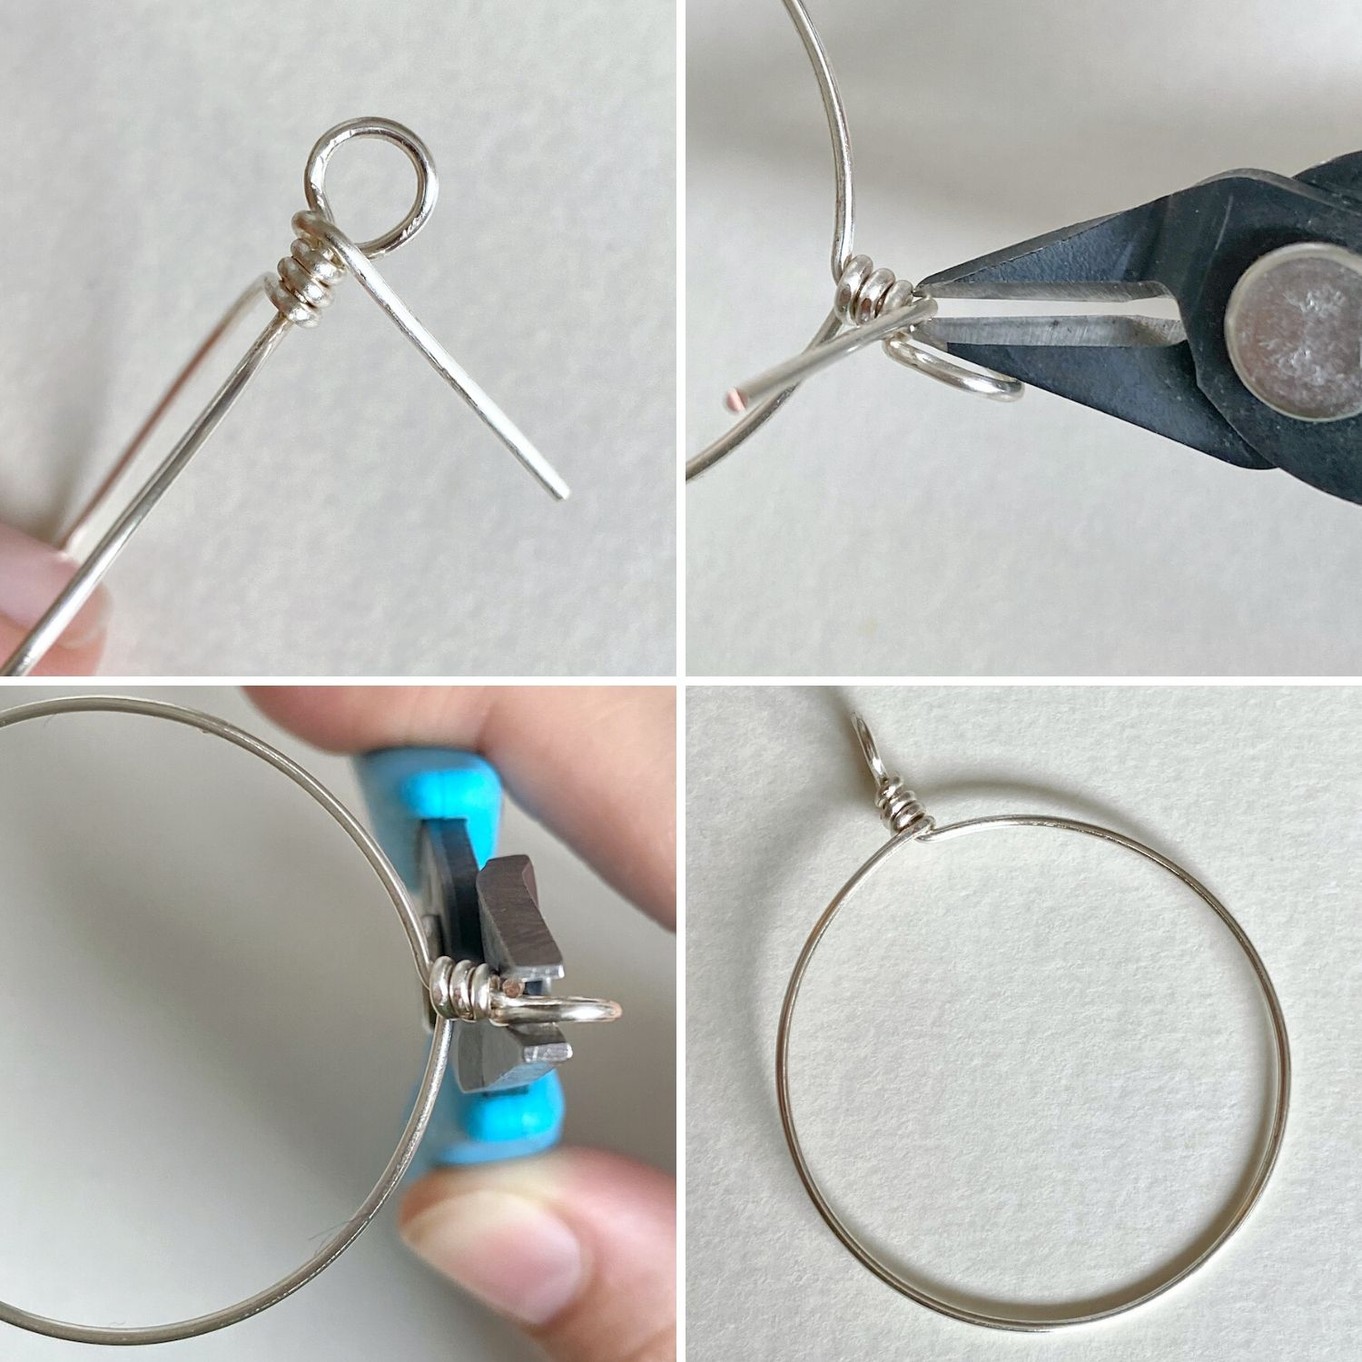
Grip the loop in your flat nosed pliers and wrap the tail around the base of the loop to secure it in place.
Using wire cutters, trim the tail end of the wire. Then take your flat nosed pliers and again, gently squeeze the cut wire against the base of the loop to avoid rough edges.
You now have your finished base! At this point, you may wish to work harden your base by squeezing with nylon jaw pliers or tapping the base with a rawhide mallet on a steel block - read our advice page on work hardening here.
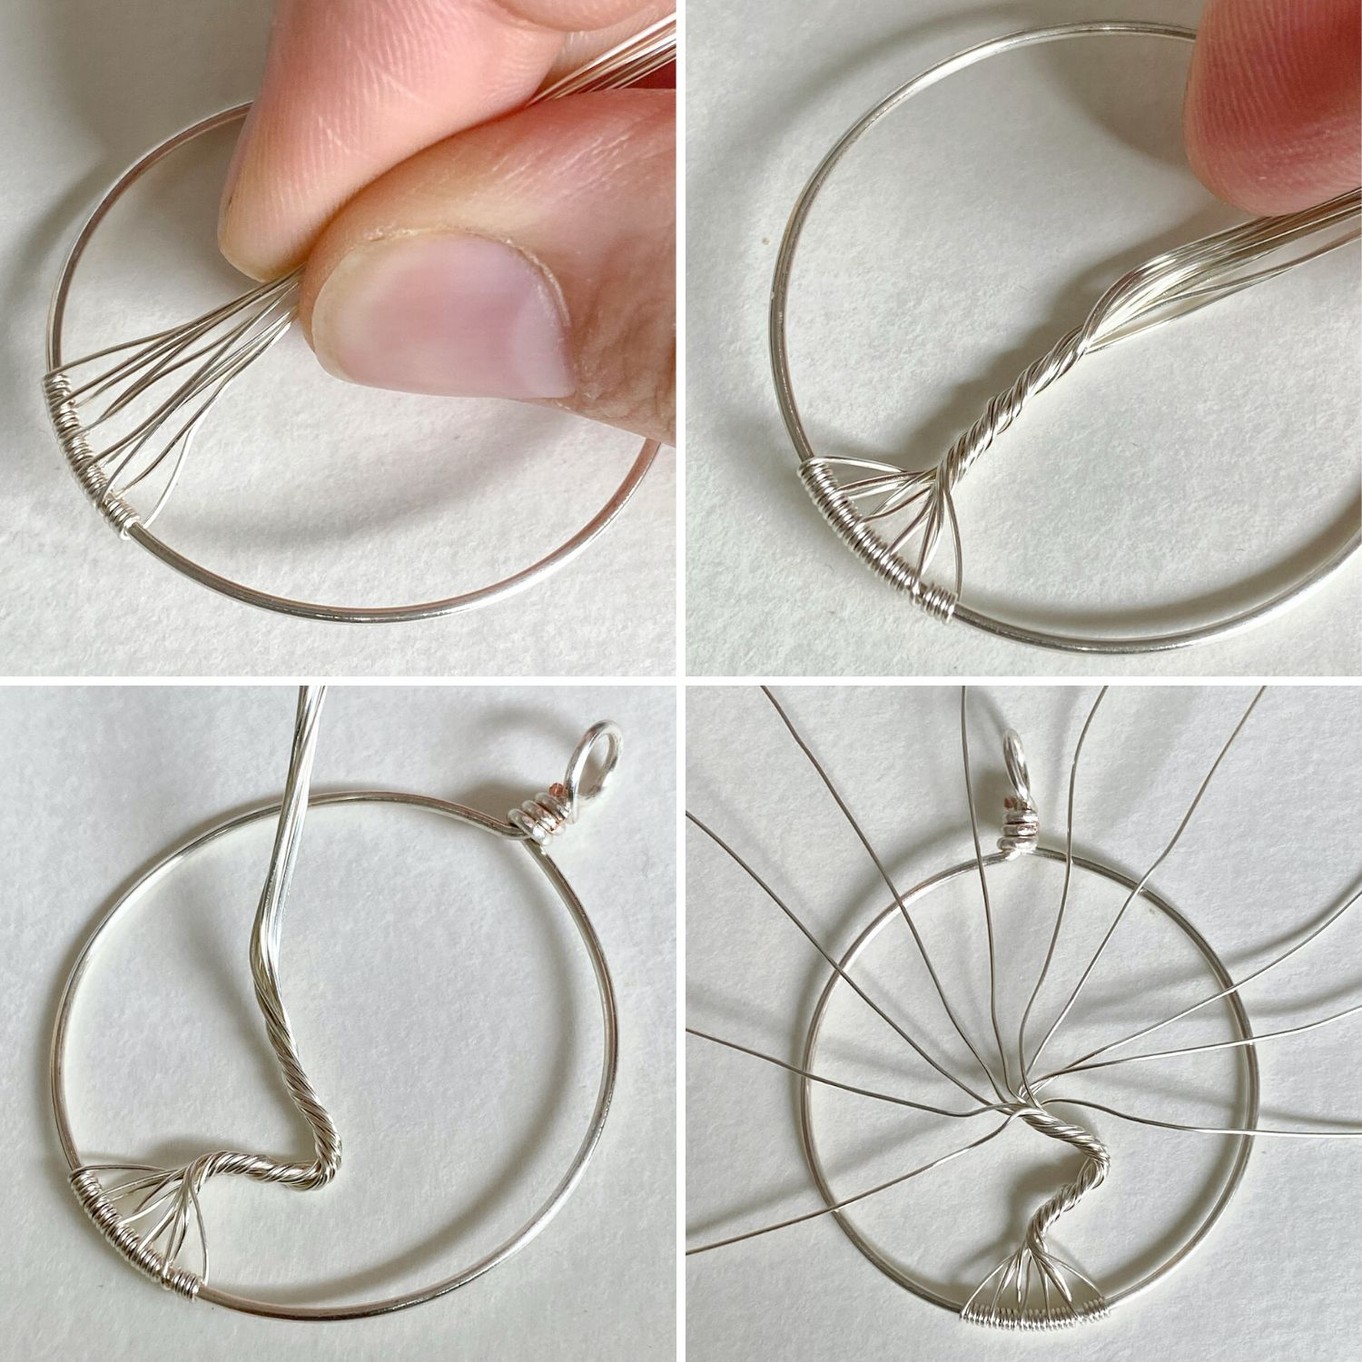
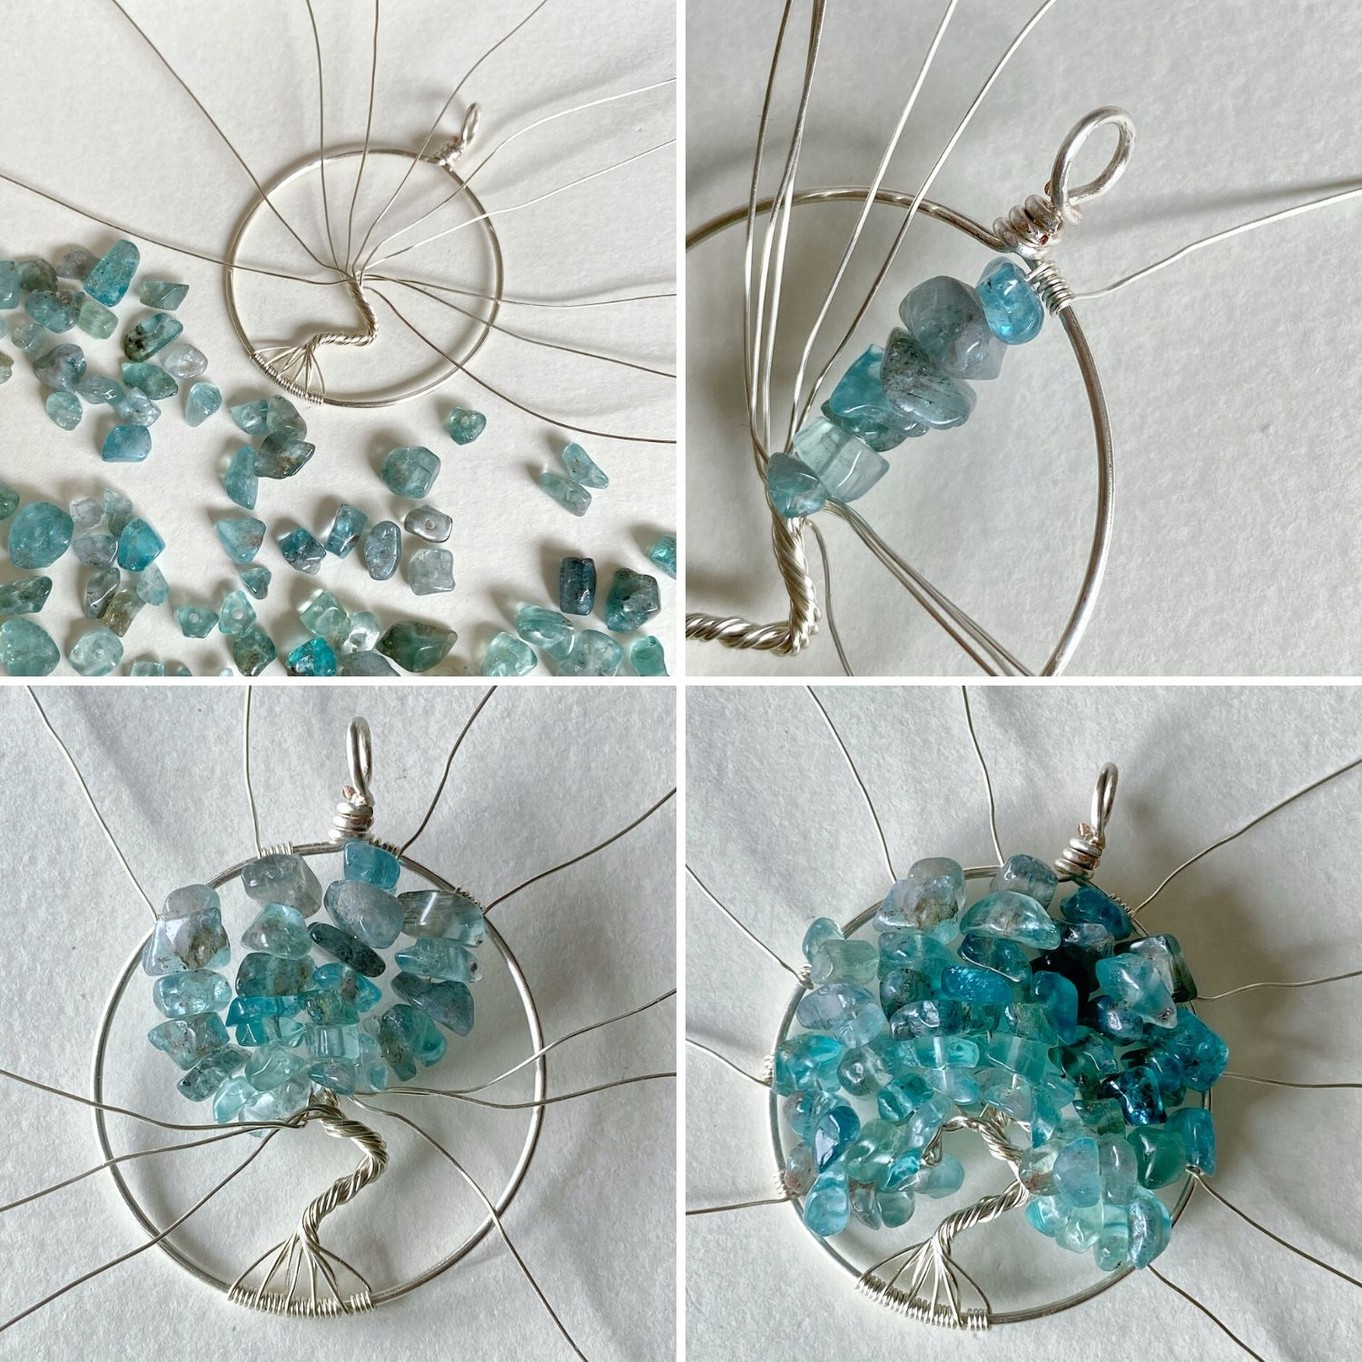
Take all the wires between your fingers and gently twist these together. Once you have about 2cm of twist you can create bends with the wires either with your fingers or using flat nosed pliers.
Once you have formed your trunks separate out your wires until the are all fanned out.
Now for the fun part!
Start adding your gemstone nugget beads on one wire at a time. Attach the 0.4mm wire to the 1mm wire by wrapping around 5 or 6 times.
Add the beads on evenly to each side of the tree one wire at a time until you have filled and attached every wire.
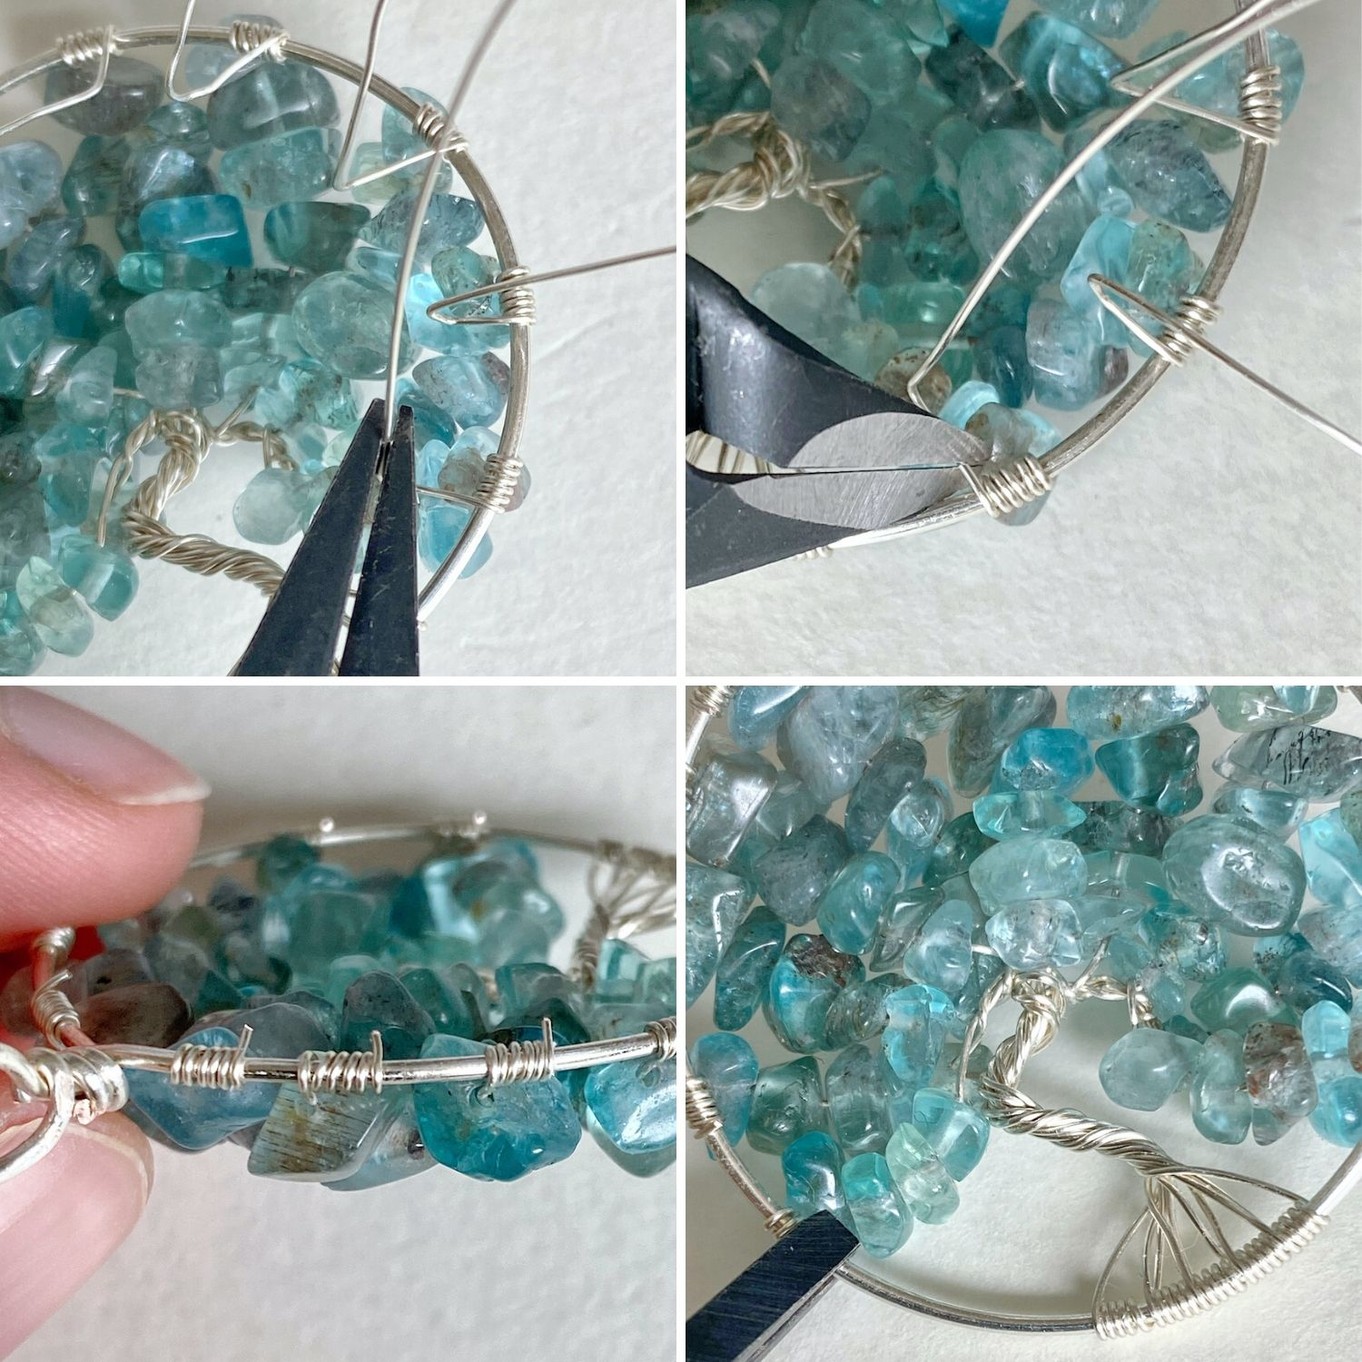
Using flat nosed pliers, take each wire and anchor to the back of the pendant base. You can make these tighter by moving the wire back and forth a couple of times with your pliers, do this to each wire.
Once you have done this, use wire cutters to cut the wire leaving approximately 1mm of wire. When you have cut all the wires use flat nosed pliers to secure the wires in place.
Explore All Gemstone Beads
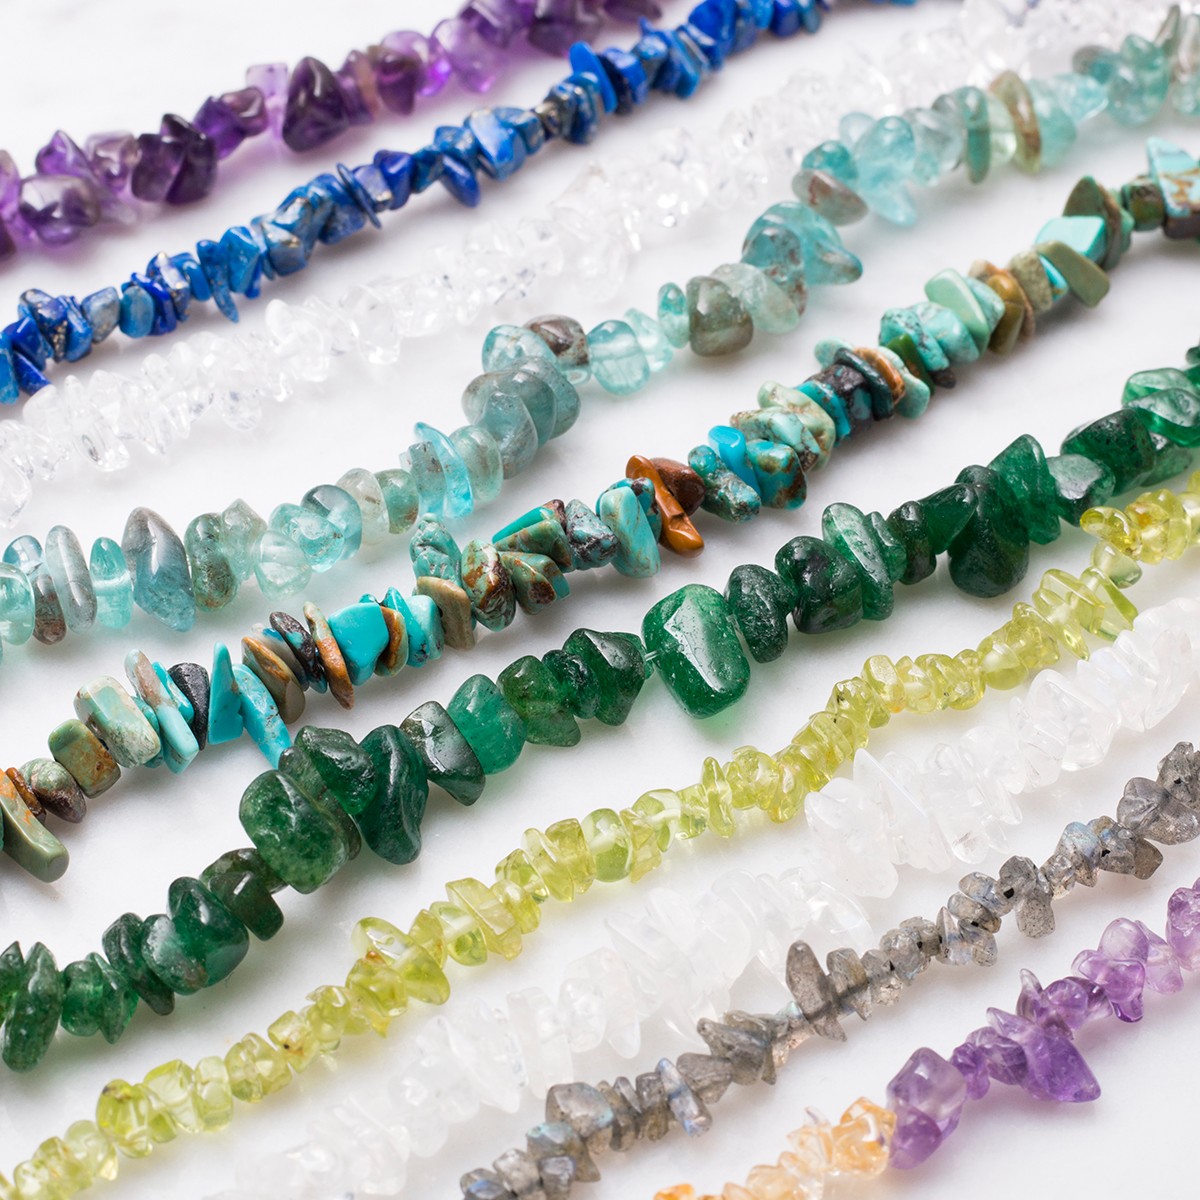
This project uses beautiful chip beads but you can choose from a whole range of beads to complete the look. Choose from 300 types of gemstone beads online with Kernowcraft.
Don't forget to check that the bead hole will fit the wire size!
This project features apatite chip beads
We absolutely love these greeny blue apatite chip beads! They are such a perfect choice for this tree of life pendant as they add a lovely pop of colour as well as offering unique shapes to create an eye catching design.
Shop Chain
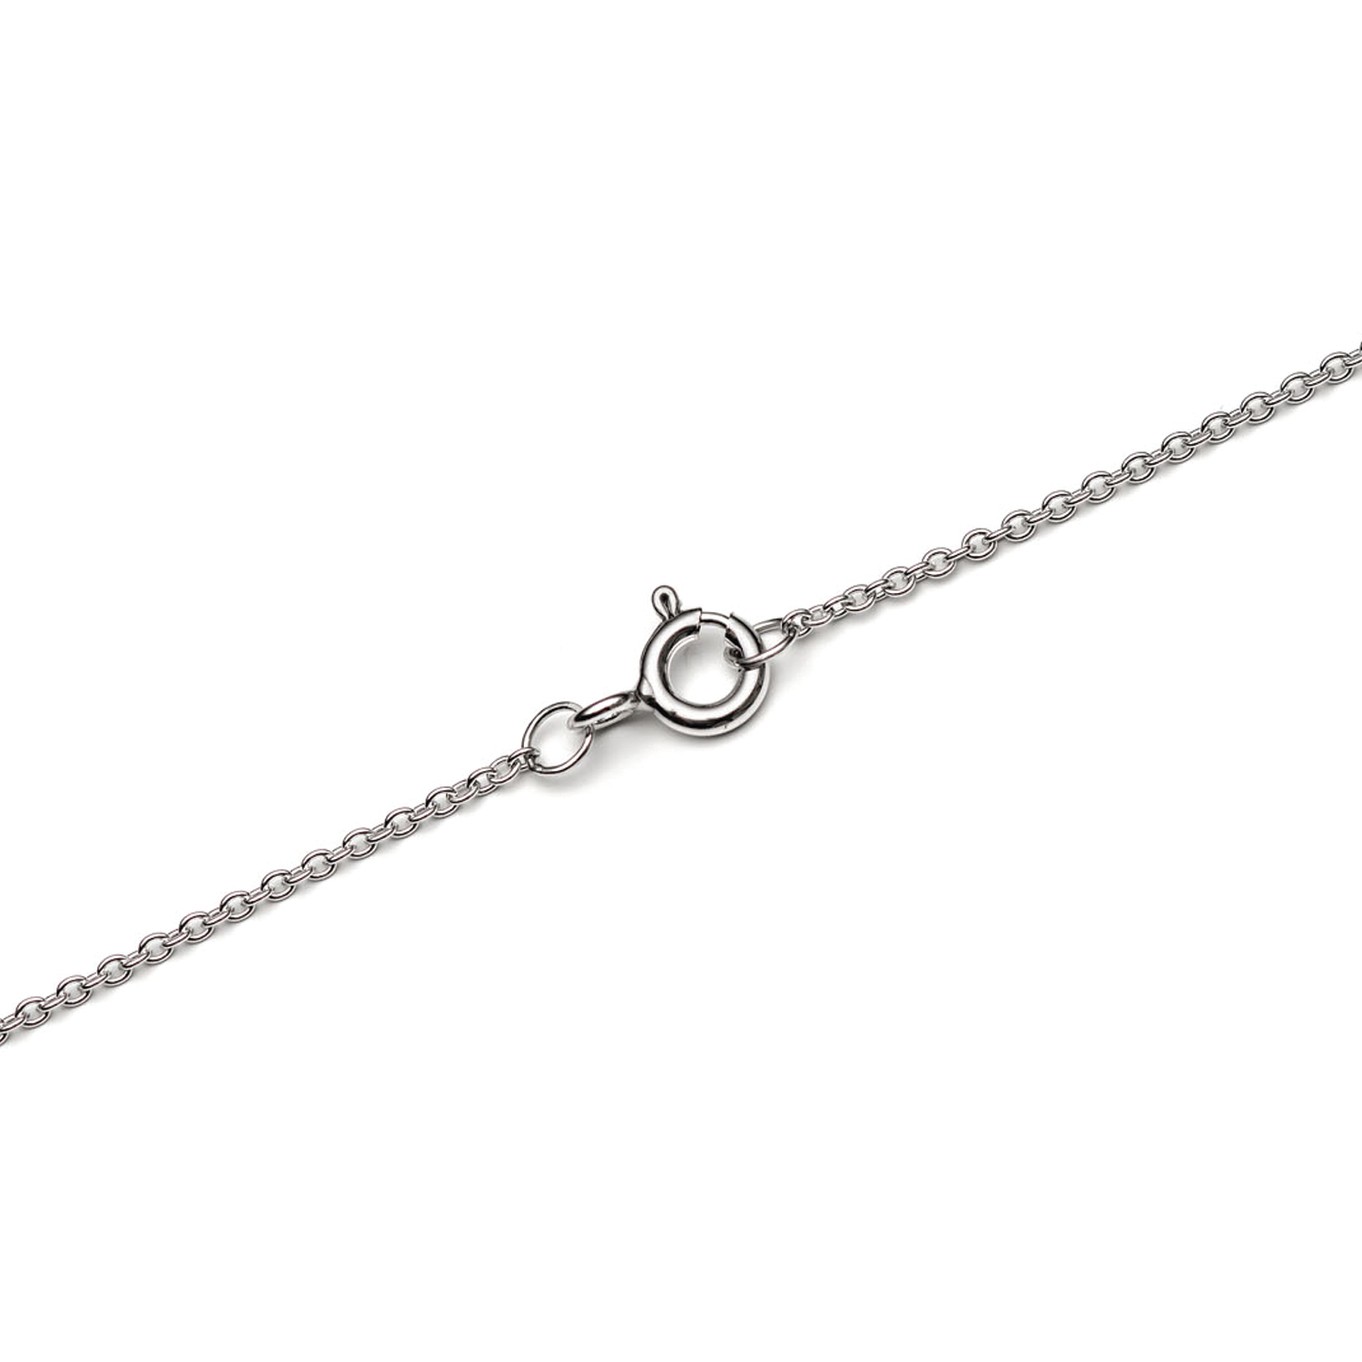
Simply attach a ready made chain to complete your tree of life pendant! We have lots available in a range of metals, lengths and styles to suit your style.
The products used in this project are suggestions to inspire you. Products used were compatible at the time of making but do be aware that stocks can vary, so do use your own judgement as to the compatibility of each item when making.
Also in this section:
- How To Make A Wire Wrapped Nest Necklace
- Tools For Making Jewellery Using Wire
- Your Guide On Choosing Wire For Jewellery Making
- Compare Jewellery Designs Using Different Sized Wire
- Wire Gauge Coversions
- How To Work Harden Jewellery Making Wire
- How To Use Nylon Jaw Pliers For Jewellery Making
- How To Use A Thing-A-Ma Jig For Jewellery Making
- How to Wire Wrap a Bead With a Headpin
- How To Wire Wrap A Bead
- How To Make A Wire Wrapped Bead Chain
- How To Wire Wrap A Briolette
- Wire Wrapped Cluster Briolette Earring Tutorial
- How To Make Wire Wrapped Bead Necklace With Handmade Clasp
- How To Wire Wrap A Rough Crystal
- How To Make Valentine's Day Earrings: Wonky Wire Hearts
- How To Make A Wire Wrapped Crystal Necklace
- 6 Wire Wrapped Ring Projects & Essential Tools
- How To Make A Wire Wrapped Bead Ring
- How To Make An Anxiety Ring
- How To Make A Wire Wrapped Gemstone Ring
- How To Make A Wire Wrapped Cabochon Pendant
- How To Make A Tree Of Life Pendant
- How To Wire Wrap A Gemstone Donut
- How To Make Christmas Tree Earrings
- Simple Sterling Silver Wire Scroll Earrings
- Soldered Circle Hoop Earrings With Beads Tutorial
- How To Make Wire Hoop Earrings & Customise Them
- Metal Charm Hoop Earring Tutorial
- How To Make A Wire Word Necklace
- 4 Wire Wrapped Gemstone Tube Bead Projects
- Festival Inspired Crystal Necklace Tutorial
HAVE A QUESTION?
If you have any questions, feel free to get in touch with our friendly team who will be more than happy to give you advice over email or on the phone.
You can learn more and find inspiration by visiting our Jewellery Making Tutorials, Jewellery Making Kits and YouTube Channel. Don't forget to follow us on social media and tag us in your designs on Instagram & Facebook, we would love to see!

